dannylv100.com
  • Projects
    • A Game In the Dark
    • Flat Kingdom
    • Aero
    • 3rd Person Shooter
  • Blog
  • Resume

Freeze-E Frosty's : Developer Commentary - Level 3

12/10/2014

0 Comments

 
Picture

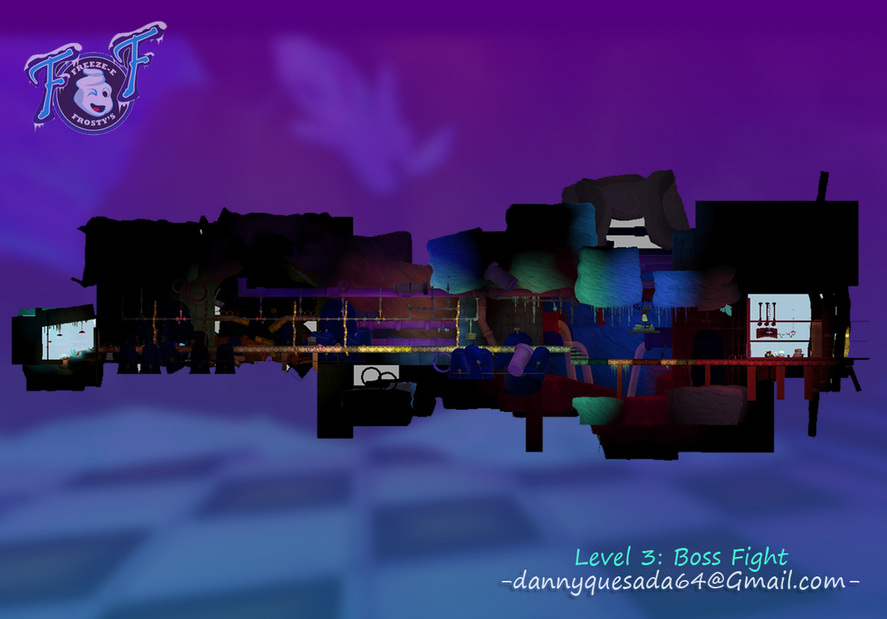
   Welcome to the third installment of  Freeze-E Frosty's - Developer Commentary. In this video series I will go behind the scenes of the third level of Freeze-E Frosty and share with you my design process.

Freeze-E Frosty's Developer Commentary - Level 3 from Danny Quesada on Vimeo.


Further Notes: Level 3

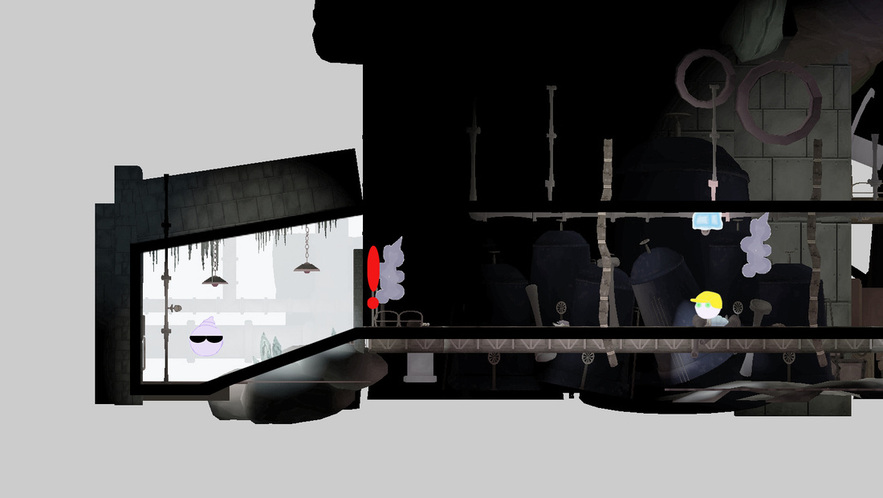
- This level was the most test played section in the entire game.
- This section features over 815 kismet sequences.
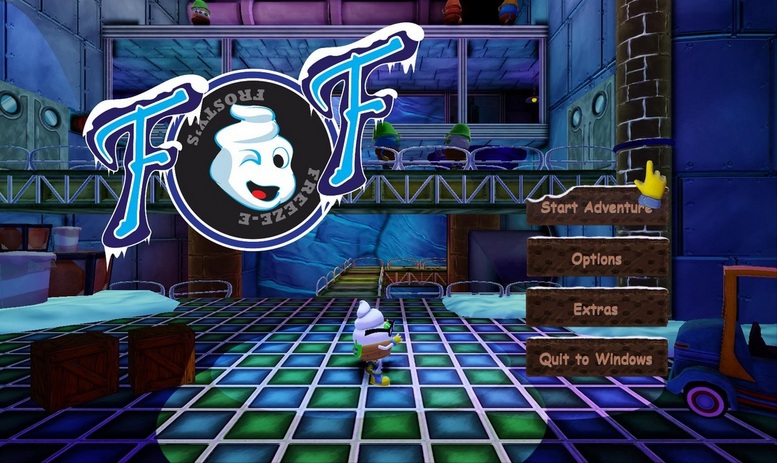
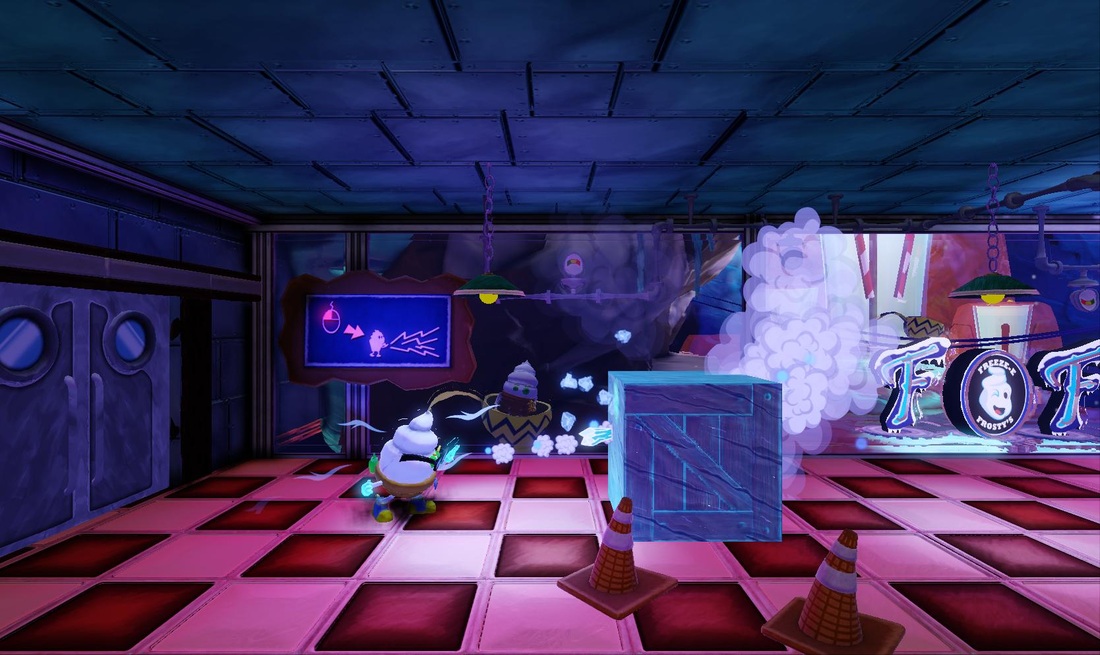
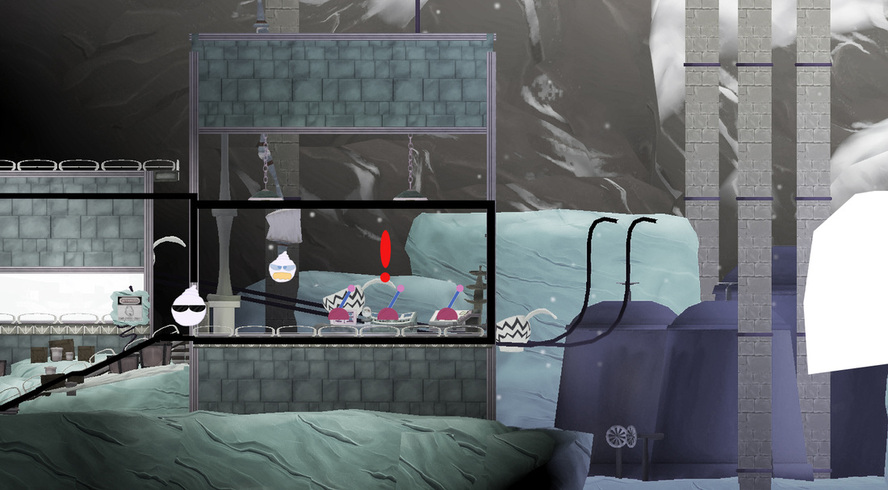
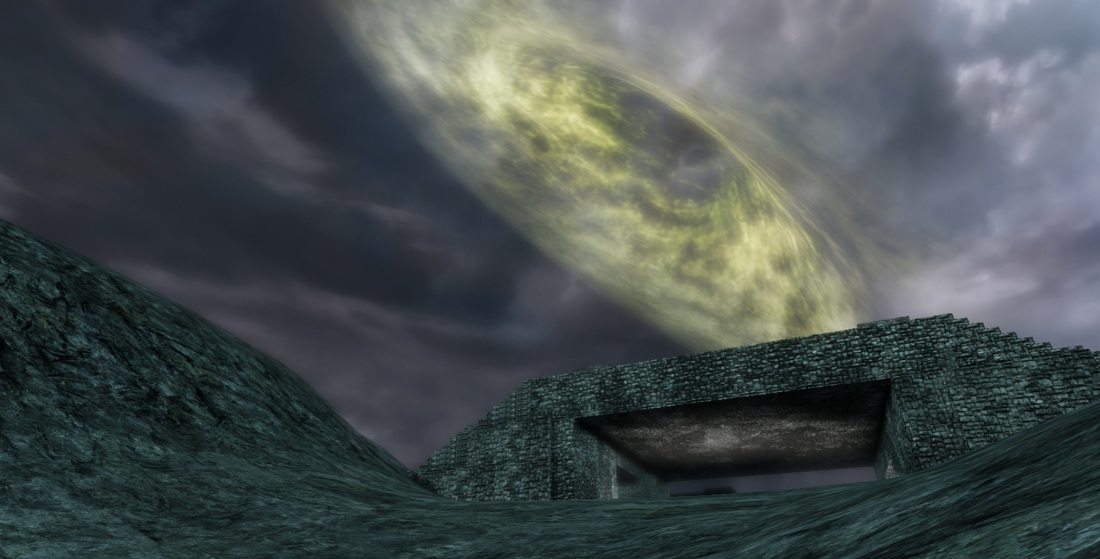
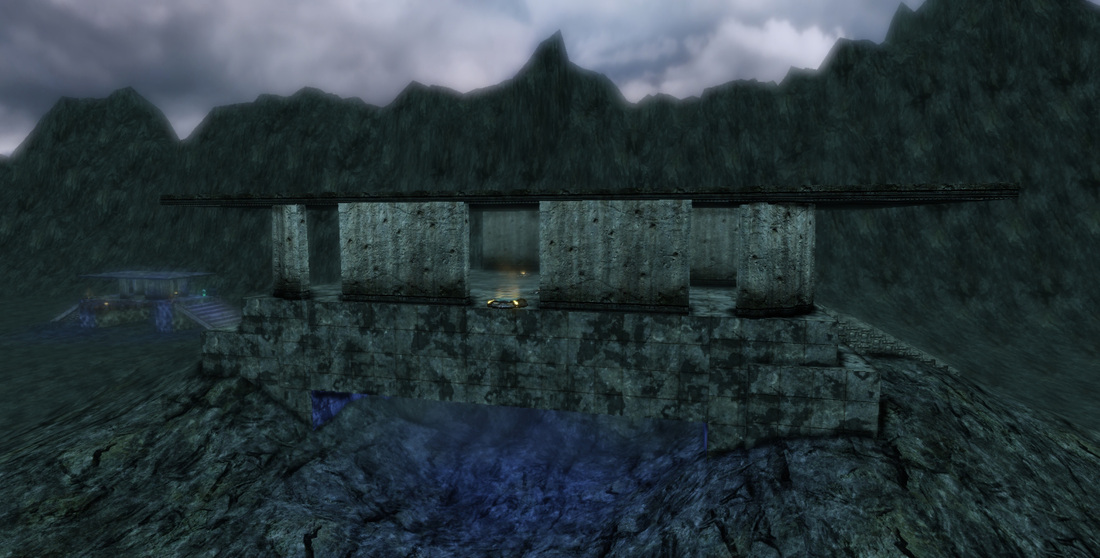
- Sections from the main menu area can be seen in the background of the first phase of the boss fight.
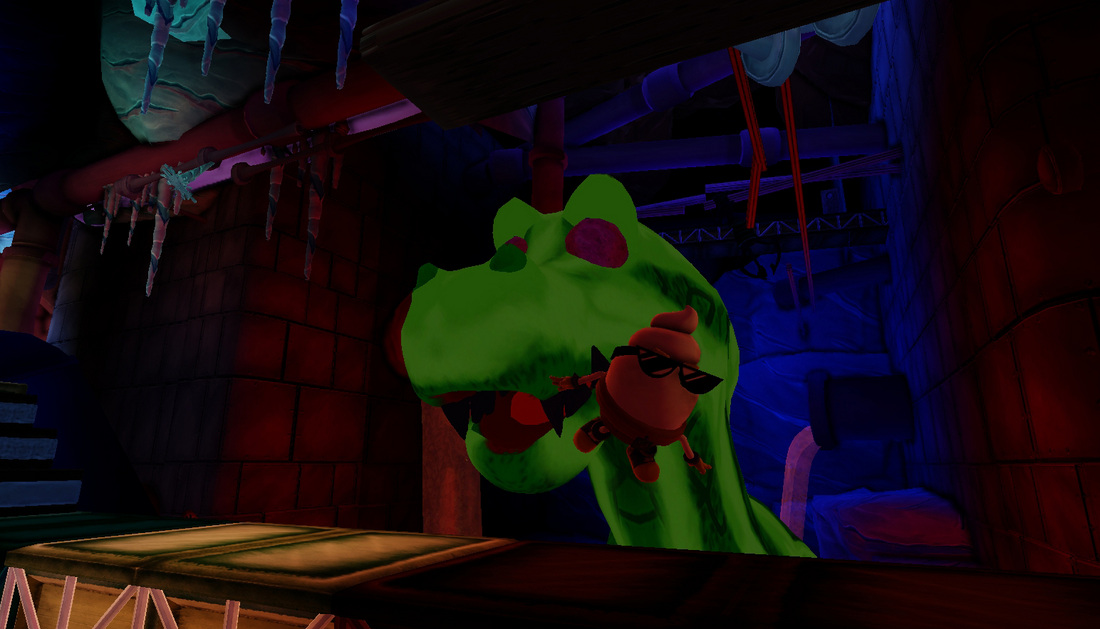
- The boss fight was all scripted inside of kismet through matinees.
- The hit points for the boss had to be tweaked constantly. Some play testers could not even freeze him once before dying.
- Originally, when you died during the boss fight you would have to start over from the start of the level. We decided to make it easier by allowing you to start off from when you died.
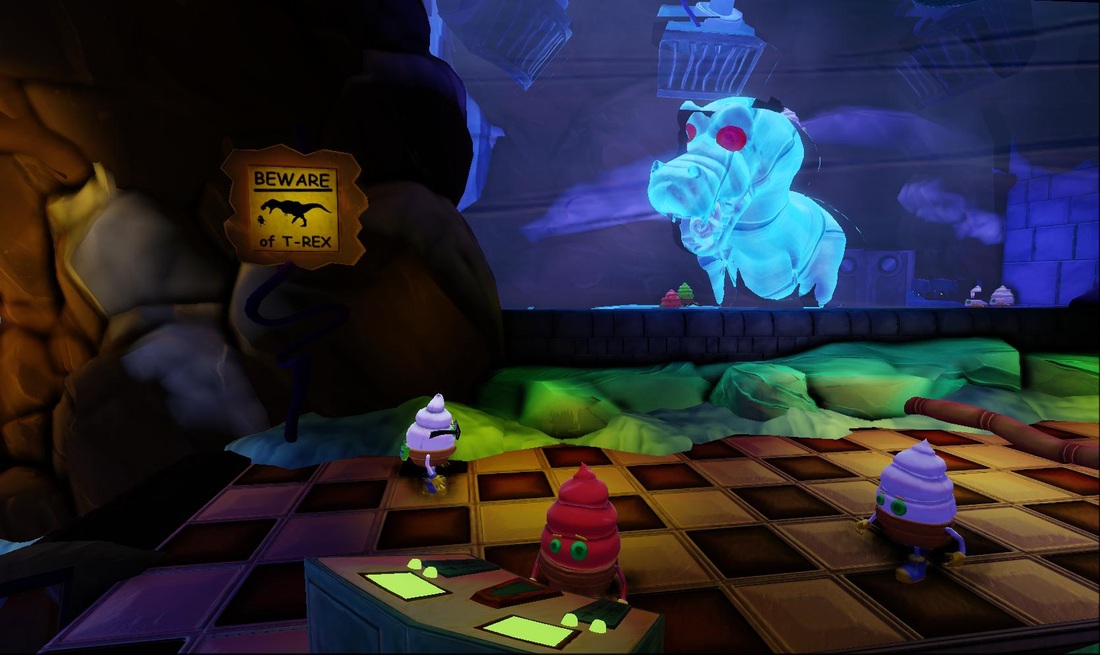
- Originally, when defeated the T-rex would explode.

- Danny Q
@Dannylv100​  ​

0 Comments

Freze-E Frosty's : Developer Commentary - Level 2

11/18/2014

0 Comments

 
Picture

   Welcome to the second installment of  Freeze-E Frosty's - Developer Commentary. In this video series I will go behind the scenes of the second level of Freeze-E Frosty and share with you my design process and about the original soundtrack.

Freeze-E Frosty's Developer Commentary - Level 2 from Danny Quesada on Vimeo.


Further Notes: Level 2

- You can listen to the games original soundtrack on our indieDb page.
- The idea for the health vent was pitched by one of our environment artist.
- The "Running Man" appears 3 times in this level in the background.
- Traveling through the vents was supposed to be much shorter, but was lengthened after positive feedback from playtests.
- There was supposed to be another section before you exit the vents, but it was cut due to time.
- The Ice Cream T-Rex appears in the background twice in this level.
- This level went through many iterations of environment art layout. The look of the level wasn't finalized till near launch of the game.
- My original intent of this level was to show the dark underbelly of the factory.
- Areas featured in this level are: a warehouse, Cookie Crumbler (where toppings are made) and the soda filtration system.
- In terms of design, this level was redesigned the least.

- Danny Q
@Dannylv100​  ​

0 Comments

Freeze-E Frosty's : Developer Commentary - Level 1

8/19/2014

0 Comments

 
Picture

   Welcome to the first installment of  Freeze-E Frosty's - Developer Commentary. In this video series I will go behind the scenes of Freeze-E Frosty and share with you my design process.

Freeze-E Frosty's Developer Commentary - Main Menu and Level 1 from Danny Quesada on Vimeo.


Further Notes: Level 1

- The main menu was originally part of the third level but was discarded. Toward the end of development it was salvaged and turned into the main menu.

- There are almost one hundred dynamic lights in the first half of the level. Once the player reaches the second floor (where the workstation is) there is a trigger that completely deletes all of the lights. This was done to keep the frame rate from dipping lower than 30fps.

- We were lucky enough to record all of the voice over work in a professional studio with talented audio personnel. We did two 4 hour sessions to record all the voice work.

-
This level went through many iterations before we went wit this design. This design was sketched by myself while I was stuck in traffic heading home one day.

- Danny Q
@Dannylv100​
​  
0 Comments

Level Design 101: Freeze-E Frosty's - Boss Battle Breakdown

5/5/2014

0 Comments


Battle For Dominance

   The layout for the boss fight was very simple. This level would just be a long corridor where the player can walk toward their goal. With each phase of the boss fight the player would be once again cut off from their goal. The player must overcome the boss by utilizing Froty's freeze gloves and dash ability.
Picture
   The programming for the boss battle took nearly 11 weeks of work. I had to bet the boss battle phases worked out, the third phase was cut, added back and altered at least 3 times before we settled on what you see in the game.

  
I had the distinct honor of not only designing the boss battle from scratch, but I also spent a week and a half of development time play testing and bug fixing back to back for days on end.

Level Goals and Objectives

Level Types: Campaign

Level Name: Boss Battle
- Single Mission

Mission Location

- World Famous Freeze-E Frosty's Ice Cream Factory
- Lower factory,storage vats etc

Visual Themes

- Dark industrial setting
- Lower level of the factory, not meant to be seen by the general public
Picture

Mission Difficulty

   This level is a straight forward boss fight. The player must use their freeze gloves to freeze the pipes above the T-rex to cause them to burst, shooting steam at the T-rex and causing him harm.

  
The boss fight is broken up into 3 phases and after the fourth phase is complete the player must go into the shutoff valve room and save the day. Once that is completed the game ends.

Level Story

   After traveling through the vents, Frosty has now reached the walkway leading to the shutoff valve room.

  
The only thing standing in his way is a huge popsicle T-Rex! Can Frosty defeat the T-Rex and save the factory?

Level Goals

- Player applies all their skills to defeat the boss

Enemy Units

- The player must defeat the T-rex boss
- There are hazards in the level that may injure or kill the player

Level 3 - Boss Battle / Shutoff Valve Room Sideview

Picture
   This is the conclusion of the game. Here is where we have the showdown between Frosty and the popsicle T-Rex. After the epic battle the player reaches their destination of the shutoff valve room.

Level 3 - Entrance

Picture
Picture
    As soon as the player walks past the stairs an event takes place. Steam bursts from a pipe and blocks the door. The player can only move to the right and can not return from where they came. As they move right they come across and injured NPC laying on the ground.
Picture
Entrance to the shutoff valve area.
   At this point we pause the players movement because it is critical that the player listens to what the NPC has to say. The NPC reveals crucial information on how to defeat the boss. The player is told to use the Freeze Gloves to freeze the red hot pipes that hang overhead. The pipe is red, it flashes and it has a sparkle particle on it to grab the attention of the player.

Level 3 - Boss Battle Phase 1

Picture
Picture
   As soon as the player enters the first phase of the boss fight they activate a checkpoint. This event triggers the T-Rex to enter the area, destroying the walkway and trapping the player between two busted steam pipes.
   The pipe above the T-Rex flashes red and has a sparkle particle over, this signals to the player that it needs to be shot at with the freeze gloves. Every time the player makes contact with the pipe it makes a low metallic ding.

  
When the player fires the Freeze Gloves at the T-Rex he flashes until he completely freezes. Once he is frozen he remains frozen for five seconds giving the player time to target the steam pipe.

   Once the player defeats the boss, he will retreat. The Steam that was blocking the player is now gone and they can keep moving toward the shutoff valve room.

Level 3 - Boss Battle Phase 2

Picture
Picture
   The second phase begins with the the player activating two events. The player is locked in by steam as the T-Rex emerges from underneath the walkway.
   You battle the boss in a similar fashion to the first phase. You dodge the attacks and freeze the pipe over his head. Once the boss is defeated the next event is triggered, a large pipe crashes down allowing the player to cross to the other side.

Level 3 - Intro to Phase 3

Picture
Picture
   After the second phase the player keeps moving forward. They will walk through a health vent that will heal them back to full health.
Picture
   As they walk down toward the steps leading to the shutoff valve room, a large pipe will come crashing down destroy the walkway behind the player.  The steps the player walks down will also come crashing down once the boss appears for the start of phase 3.

Level 3 - Boss Battle Phase 3

Picture
Picture
   As the third phase begins the player will activate the next checkpoint. If the player dies in this phase he will be respawned on the left platform next to where the stairs used to be.

   As the Rex makes its entrance it will walk to the center platform and destroy the middle platform of the catwalk. If the player is on the middle platform they will fall down to the chocolate river below and die.

  
During this phase the boss has 5 different types of attacks. With every roar the T-Rex does he will cause icicles to rain down on the player. The T-Rex also has stomp and roar combo which showers the player with many icicles.
Picture
   At this phase of the boss fight the Rex is invulnerable and can not be frozen. The key to defeating the boss is in freezing the ice cream sandwiches that hang overhead. Once they are frozen they will break, dropping the heavy steel pipes onto the steam pipes below. Once the pipes fall it triggers the ending sequence, Steam begins to douse the Rex melting it. The platform that was obscured by steam is now reset and the steam is removed. With this the player can now move forward to the Shut off valve room.

Level 3 - Shutoff Valve Room and Ending

Picture
Picture
   After the boss is defeated the player continues on their path and will be contacted via their walkie talkie to go to the shut off valve room. As they walk toward the door they will enter a workstation with a worker NPC inside. We call this NPC the "soda engineer" he is the one that contacted the player over the walkie talkie when they first arrived.
Picture
   Once inside the engineer will tell the player to turn off the shutoff valve. To the far right of the room the player will see a valve continuously spinning out of control. It has a sparkle effect to it to help alert the player that it can be frozen. With the valve frozen the final cut scene is triggered.
Picture
   The final event is a short cinematic that has the player run out of the shutoff valve room to look at the defeated Rex. He is then followed by the engineer who makes a quick joke about the T-Rex being "T-wrecked". The game ends and the credits roll.

Level 3 - Boss Battle


- Danny Q
@Dannylv100
0 Comments

Level Design 101: Freeze-E Frosty's - Level Two Breakdown

4/21/2014

0 Comments


Diving Deeper into the Factory

   After the layout for the first level was underway I began construction of the second. I knew that this level had to be quite a change visually and tonally from the first.

  The first level was bright and inviting, this level was going to be dark and a bit hostile. I took inspiration from Super Mario Bros. for the NES. World 1-1 was a bright happy place that was above ground. However, as soon as you get to world 1-2 the Mushroom Kingdom was no longer so inviting. And that was the tone I was attempting to convey with this level.
Picture

Level Goals and Objectives

Level Type: Campaign

Level Name: Factory Depths
- Single Mission

Mission Location

- World Famous Freeze-E Frosty's Ice Cream Factory
- Lower factory, lots of machinery and equipment

Visual Themes

- Dark industrial setting
- Lower level of the factory, not meant to be seen by the general public
Picture

Mission Difficulty

   Level 2 is where the difficulty begins to ramp up slowly. The player will have to use everything they learned from the previous level in order to progress. The player faces a series of platforming sections and simple puzzle solving.

Level Story

After the meltdown, Frosty finds himself trapped in the deep dark depths of the factory.

  Frosty must now make his way through the bowels of the factory so he can find the "Shut-off Valve" room.

Level Goals

- Player will now use everything thing they learned from the previous level to traverse the challenges of this level

- To tell more of the story through background elements and events.

Enemy Units

- There are no enemy units present in this level
- There are hazards in the level that may injure or kill the player

Level 2 -Side View

Picture
The second level has a large shift in terms of tone from the first.
  Level 2 is where the gloves come off a bit. Players will now have to face an array of challenges that will test their abilities and reflexes. This levels also builds up to the final confrontation with the T-Rex from the previous level.

Level 2 - Forklift Area

Picture
Picture
   Once the player reaches the bottom of the elevator shaft they may catch a glimpse of their boss attempting to talk to them through a TV. Before the player gets a chance to hear what the boss is trying to say, the monitor explodes. The player can't go left so as they must continue on their journey by heading to the right.
   As the player moves toward the right they will encounter the first health vent of the game. The health vent will heal the player gradually as they stand in its healing breeze.
Picture
   Once the player gets near a large fan they are contacted by the Boss via the walkie talkie on their hip. The first obstacle they face will be a large fan is blowing air that is so powerful that the player can not get though. The solution to this puzzle is to freeze the fan blades causing it to fall apart.

   In the forklift area the player must jump up and down on the steel crates to reach the catwalk overhead. Inside the workstation we can overhear some NPC characters talking. If the player continues forward they will set off an event where the T-Rex will appear and eat an NPC in the background.
Picture
    Now that the boss can no longer reach the player with his TV monitor he will use the walkie talkier on Frosty's hip. The Boss will tell the player over the walkie talkie to get to the shutoff valve room. This is the player's ultimate goal, reaching this area will end the game and result in a victory for the player.

   The boss will act as a sort of guide for the player. He will dispense directions/tips/hints through the walkie talkie and will help the player get to their ultimate goal.


   Once the player gets into the vent they will encounter more fans. As the player learned from earlier the fans are strong enough to move the player. So if the player must now stand on top of the fan so that it will carry them further up into the higher parts of the vents.

   In the highest part of the vents the player will encounter a frozen NPC worker. Instead of having the option to freeze them the player is told to use the "E" key to knock him down over the spike pit effectively making a bridge. As the player travels further into the vents they will see another worker trapped in the vents floating inside a vent in the background.
Picture
Frosty watches another worker float helplessly in another pipe.
   At the very top of the vents is the first checkpoint of level 2.  This checkpoint is implemented in this are because the vents will have few spots where the player can die, frequent checkpoints will prevent the player from becoming frustrated.

Level 2 - Vents Part. 1

Picture
Picture
   Now that the player has reached the checkpoint they encounter the first real danger, a icicle pit. There is a small sign on the inside of the vents that will remind the player to use their dash ability. Dashing is the only option because the vents do not give the player enough space to jump.
Picture
Frosty must be careful not to fall into a deadly icicle pit.
   After the spike pit we encounter the second danger of this level, Falling Icicles. With some careful maneuvers the player can avoid being hit by the icicles altogether and continue on their journey to safety.

   The last thing the player will encounter is a running man NPC inside one of the vents overhead. The player then drops down into the next section of vents.

Level 2 - Vents Part. 2

Picture
Picture
   Once the player is in the new area they will have to dash over another spike pit and avoid another group of falling icicles. This area has two checkpoints very close to each other because the risk of dying is very high is this section.
Picture
Frosty makes a daring jump as he tries to find a way out of the maze of vents.
   As the player nears the broken steam pipe area there is a group of NPCs below him. Once the player is able to make it past the steam and event occurs. One of the NPCs in the vent below the player loses his grip and slams into a wall of icicles. He is impaled on the wall as the player drops down to the second checkpoint in this area. The second checkpoint in this area is near a large icicle pit.
   If the player is capable of passing over the spike pit they have an easy ride to the next checkpoint.

   The next checkpoint is in preparation for the next area known as the "Cookie Crumbler".
Picture
Frosty is just about to exit the maze of vents.

Level 2 -The Cookie Crumbler

Picture
Picture
   This is one of the trickiest area in the game. As you enter this room, the Boss will tell the player to find a way out. When the player reaches the center platform under the health vent they will be told to find "Tim's Office".

  
There is a large Kill zone volume underneath the center platform. If the player were to fall inside it would send him back to the checkpoint at the start of this section, outside of the vent on the wall.. If the player were to stand on either of the platforms going up or down they will be taken into a kill zone volume.
Picture
Tim's office.
Picture
   Once the player reaches Tim's office they will need to flip a switch which will then cause an explosion. The explosion will open up the  giant vent on the right side of the map, which in turn allows the player to exit this area.

Level 2 - Air Vents and B-team Commandos Staging Area

Picture
Picture
   This area of the factory is all about moving the player along quickly. This is achieved by having the player walk into an air vent. The vents will quickly propel the player into the staging area with very little trouble.
Picture
   The staging area has a brief interaction with some NPCs (The B-team Commandos). Once the player engages them they will be treated to a brief cut scene. After the cut scene the player walks through the door and the level ends.

- Danny Q
@Dannylv100
0 Comments

Level Design 101: Freeze-E Frosty's - First level Breakdown

3/11/2014

0 Comments


Introducing the player to the world

   In this installment of "Level Design 101" I will go over the first level of the game Freeze-E Frosty's. I worked on this project for 9 months back in 2010. I was the lead Level Design and I designed 3 levels and the boss battle.

   I will be discussing each section of the fist level, going through my thought process and talking about the decisions I made and why.

Level Goals and Objectives

Picture
The Main Menu.

Level Type: Campaign

Level Name : Welcome to Freeze-E Frosty's
- Single Mission/Tutorial

Mission Location

- World Famous Freeze-E Frosty's Ice Cream Factory
- Interior Factory and work stations
-Ice, Snow and mechanical factory equipment

Visual Themes

   - Stylized cartoon elements
- Lots of blues and cold colors
- Contrast between factory and snow/ice
Picture

Mission Difficulty

 This level will act as an introduction to the game's world and gameplay mechanics. The first few minutes of the level will steadily give the player information on the world and as the player progresses it will also give the player their in game abilities and show the player how to use them.

   The overall difficulty of the level is very easy. By the end of this level the player should have a very firm understanding of how to play the game.

Level Story

   Frosty is the newest employee to the world famous Freeze-E Frosty's Ice Cream Factory.

   On his first day on the job he must learn how to use his freeze gloves and dash boots while making it to his work station.

   Once he Arrives at his station, things go horribly wrong and the factory begins to meltdown. Frosty must then escape whilst utilizing some of the abilities he learned along the way.

Level Goals

- Player is introduced to "The Boss"
- Player learns how to use the "Freeze Gloves" ability
- Player learns how to "Jump"
-Player learns how to "Interact" with items/objects
- Player is introduced to the T-Rex enemy
- Player learns how to use the "Dash" ability
- Factory explodes, causing the events of the game to unfold

Enemy Units

- There are no enemy units present in this level
- There are hazards in the level that may injure or kill the player

Level 1 - Side view of first level

Picture
The entirety of the first level is very large. It took weeks of iteration before I settled on a design.
   The first level of the game serves as the tutorial that will teach the player everything they will need to know about the game.

   This is where were introduce a few of the game's characters, we do some foreshadowing and we establish the world and atmosphere of Freeze-E Frosty's. It was very important for us a team to quickly establish the world and get the player in the game as quickly as possible.

Level 1 - Factory Entrance

Picture
Picture
   The game opens up with a brief cinematic. At the end of the cinematic the player enters the room. The cinematic introduces the player to the world of the Freeze-E Frosty's Ice Cream Factory. It has a bit of humor and is very light and colorful. We establish early on that this game is going to be a lighthearted 2D adventure.

   Once Frosty (the player) enters the factory, he stands in front of a large s
ign in the background. That sign in the background is a billboard that tells the player how to walk left and right in the world (A key to to move left and the D key is to move right).
Picture
Frosty stands in the lobby before he enters the factory.
   As the player begins to walk into the waiting room, a monitor drops from the ceiling. This is where we introduce the character simply known as "Frosty's boss" or just "The Boss". He is the character in charge of the factory and he will be giving the player their missions. I wanted to introduce the player to the story as soon as they enter the factory without having to have a long cinematic that will take the player from the experience. This also meant that a lot of the story elements can be seen in the background of the levels. 
    As the player gets to the door they encounter the one of the many NPCs in the game, the receptionist. The door is locked but as soon as the player gets close it will be unlocked and they will enter the next area and begin their adventure.

Level 1 - Factory Walkway

Picture
Picture
   As soon as the player enters the walkway there is a wooden crate obstructing their path. We have an encounter with another NPC, "The Foreman" who will instruct the player to click on the left mouse button to use their "Freeze Gloves" to freeze the empty wooden crate, shattering it and clearing their path. On the wall behind the player we also have a sign with the picture of an NPC using their freeze gloves as an arrow clicks down on the mouse button, to help guide the player.

   Once the player freezes the box in front of them they are rewarded with an audio cue of "Good job kid, just like that!" from the foreman. To enforce the freezing mechanic with have another freezable wooden crate in front of the player being held by two NPCs. The player must freeze the crate they are carrying to continue moving forward.

  
The next obstacle that the player comes across is a forklift that is moving its forks up and down. At this part we have a sign on the wall informing the player to use "W" to jump. The player will then know how to jump, this means that they can now jump onto the forks of the fork lift. The forks on the fork lift only lift the player high enough to know that they can get onto the ceiling of the walkway. In order to continue forward they must once again use W to jump onto the walkway.
Picture
Frosty freezes a wooden crate.
   Once the player reaches the top of the walkway they can go left and interact with some NPC characters. If the player goes right they will run into a group of NPC characters who are trying to fix a malfunctioning crane holding a steel crate. The player is supposed to fire their freeze gloves at the crane which will cause the crane to drop the steel crate and move out of the way. Here we reaffirm the two things the player learned, 1) They can use their freeze gloves with the left mouse button 2) They can use "W" to jump over obstacles. The player also learns something new, they can not freeze a steel crate. Steel Crates are reinforced and will not freeze or shatter when you fire upon them with the Freeze Gloves.

   Once the player gets down from the top of the bridge there will be two NPCs talking amongst themselves in the background. As the player progresses further they will see a fellow worker use their freeze gloves to extinguish an NPC who is on fire. If they player chooses to they can either freeze the worker to get through or simply jump over them, either way we further reaffirm the skills they just learned.

Level 1 - Elevator and Drawbridge

Picture
Picture
   The player will get off the walkway and proceed to move right toward an elevator. In this area thy will find a large glove hand that will point them toward the elevator. If the player continues to go right they will see an image of Frosty's Boss appear on a nearby monitor. He will then inform the player to get back to work (to get on the elevator and go up to the next level).
   If the player reaches the end of this area they will see a large ice cream sandwich drawbridge. This drawbridge leads directly into the heart of the factory. The player can not continue to the factory at this point and is taunted by a lone NPC worker. The player's only option now is to take the elevator up toward the second floor.

   The player can avoid all of this and just take the elevator to the second floor. It is at this elevator that we teach the player to use "E" to activate switches/buttons/levers/interact.
Picture
Frosty's Boss tells him to get back to work.

Level 1 - T-Rex Laboratory

Picture
Picture
   Now that the player has reached the lab area they have two choices. They can go left to interact with a group of NPCs or head straight toward the lab.

   If the player heads into the lab it will suddenly lose power and the frozen T-Rex will begin to awake from his icy slumber. After the power is restored the door on the right opens and the player can continue to the next area of the factory.  
Picture
Frosty walks by the Frozen T-Rex as workers man their stations.
   It is important to note that at this part of the game we did not want to stop the player from moving because we believed that if the event in the background is interesting enough then the player will naturally slow down and stop to watch rather then forcing them to sit still. Forcing the player to stop even for a few seconds can separate them from the game world.

   After the factory meltdown there is an event with the T-Rex. He breaks free from his frozen slumber, eats an NPC and storms off into the bowels of the factory. His escape and rampage are foreshadowed by the loss of power in the earlier sequence.

   After Meltdown: The elevator button has an event tied to it, at the moment the elevator will not go anywhere until the factory begins to meltdown. Once the factory has gone into meltdown mode the elevator will take the player to the second level and level 1 is completed.

Level 1 - Dash Tutorial and The Malfunctioning Bridge

Picture
Picture
  This are is where we introduce the player to their new item, "Dash Boots". Once activated the player is told to use the "S" key to activate and use their dash ability. Ahead of the player are high pressure water jets shooting out from a few broken pipes. If the player attempts to use his gloves the water will become ice and form a temporary barrier. If the player attempts to just simply run past the water, the pressure will knock them back. The only way to get passed the water is to use the Dash Boots. The player needs to get through two more wall of waters before they can continue on. This is done to help reaffirm the dash mechanic.
Picture
Frosty Freezes the water coming out of the pipes before he learns he can simply just "Dash" through them.
The player eventually runs into a malfunctioning bridge. Here they have two options, 1)They can either dash across with proper timing, 2)jump over it using the W key. Once they reach the other side they will reach the first checkpoint in the game.

   After Meltdown:  The player back tracks through this area heading back toward the elevator. The first dangerous thing they encounter is the malfunctioning bridge, which has now collapsed, revealing a large pit of spikes. The player can once again dash over the gap or with some skill, clear it with a well timed jump.

  We introduce the pit of spikes here so we can teach the player the consequences of death. If they player were to fall into the pit they would die, but be respawned nearby via a checkpoint.

  After the player clears the gap they will then have to dodge some falling rocks. The rocks do moderate damage to the player and can easily be avoiding by a well timed dash. Once again, this is here to teach the player that they will face dangers in the environment.

Level 1 - The Workstation and Meltdown

Picture
Picture
   Once the player reaches their workstation they are prompted by  "The Boss" to activate the workstation. They will use the "E" key to activate a series of switches that will then in turn activate a machines in the background. Once all the machines have been activated this will trigger an event where the machines malfunction and the factory begins to meltdown. At this point the player is prompted by their boss to head toward the elevator outside the T-Rex lab so the player can escape the dangerous factory floor.

- Danny Q
@Dannylv100
0 Comments

How to Create Physics based Collision for a Custom Weapon

12/20/2013

0 Comments

 
Picture
  Welcome to my latest blog post. I know it has been a while since my last post, please forgive me as things have been really busy for me on a few different levels. Luckily a lot of good things are in motion and hopefully I will be able to share them with everyone in the near future.

   Something I have been working on recently is making physics assets inside of UDK. I have been working on making a rag doll for the characters of  my current project (Formerly known as In Ruins). I also decided to go ahead and build all of the physics collision for the weapons.

 Giving weapons physics based collision will help them react realistically in your game world. In this tutorial I will go over how to build proper collision for your weapons and what collision works best and why.

Getting Started

Picture
  The first thing I did after opening up UDK was to Fully Load my Weapons package. So make sure to fully load whatever package you have your weapon saved in (Example: My_Custom_Weapon).

  After that I open up the the MP_Weapon_TMP package and I select Meshes. Inside I see three things. I see the Skeletal mesh TMP, the Static Mesh TMP and the Static Mesh of the TMP magazine. Double click on the Skeletal mesh of your weapon so the skeletal mesh open up.
Picture
   Your weapon requires 3 bones for this to work. Your gun should have b_gun_root, b_gun_lefthand and MuzzleFlashSocket.

   After you've made sure you have these bones right click on your skeletal mesh and select the "Create New Physics Asset" option.
Picture
  Once you clicked the "Create a New Physics Asset" option a dialog box will appear. It will ask you where to save the package and what group/name. For this I made sure to keep it with the rest of my TMP files so I did not change the package. For grouping add it to the Physics Assets folder, if you do not have one create one by typing in PhysicsAssets (all one word) or Physics_Assets.

 As far as the name goes make sure to start it off with PA (for physics assets). Your name read as "PA_NameofYourCustomWeapon_Physics".
Picture
Just keep all this information set to it's default setting when building physics for weapons. You will have to change a few things for characters.
  After you punch in the information another dialog box will appear. This one has a few options for your newly created physics asset. When creating a Physics Asset for a weapon such as the TMP all you need to do is leave everything set to default.

 Once you're done reviewing this dialog box click "OK" to immediately open up the PhAT editor (Physics Assets Editor).

Inside the PhAT Editor

Picture
   The PhAT editor should open up immediately and the first thing you should see is your weapon surrounded by a few wireframe boxes. These boxes are built onto the bones of your weapon. These boxes are the default physics collision of your weapon and for the most part you will need to delete them.
Picture
   For my weapon the bone I want to use is the bone known as "tmp_b_root". This is my root bone and is the only bone that will give me the proper collision I want. The other two boxes will not properly interact in the world when we run a simulation.

   If you're not sure what collision box is  connected to your root bone, look to the right of your screen and click on the section that says "Tree".
Picture
   To run a simulation inside the PhAT editor press the "S" key on your keyboard. At the moment your weapon is bound to be flipping around and possibly the mesh may be breaking apart and getting stretched. This is because the collision is not set to the proper bone (In my case, the root bone). To end the simulation press "S" again.
Picture
   Start deleting the bones that are not your root bone. A dialog box will pop up, just click ok. As long as you are deleting the non essential collision boxes their shouldn't be any issues. The only remaining box should be attached to your root bone.
Picture
   Run another simulation. The result should be your weapon falling down and colliding with the floor. If you get a result similar to the one picture above this means you are ready to start adding proper collision to your weapon.

Know your collision

Picture
   There are 3 types of collision primitives you can use to build physics collision for your weapon. You have the all purpose box, sphere and sphyl. I call the box all purpose because it can be used for just about anything, and it can be scaled into a rectangle. I do not recommend using the box for your custom weapon because the box is the most costly piece of collision to use.

  The Sphyl is what you are going to want to use for majority of your collision. In my experience, spheres are best suited for characters and you probably wont be using them for any weapons.

Setting up Collision

Picture
   The next step is to select your root bone. You can tell it is selected because it will be highlighted a yellow color. You want to build your collision on this bone, so what you want to do is go to the menu bar atop the screen and select one of the new collision buttons. For the TMP I want to use a sphyl, so I will choose to add a new sphyl.
   Now that I have my sphyl added in I need to get rid of the box. Just like before I will go ahead and select the box. Becareful, select the box  directly by clicking on it or by selected "box" in your properties tree. Delete the box and and leave the sphyl behind as the only piece of collision.
  I am going to use this sphyl as the top part of my TMP (The slide and barrel components). So what I am going to do now is scale it down with the "R" key. Going to pull the sphyl closer together until I get it to wrap around the the top portion of the TMP.
   Now that I have the top portion of the TMP enclosed in collision I am going to click on the "Add new collsion..add sphyl" and add another sphly to my TMP.

  The next step is to rotate it into position. Using the "E" key to rotate the sphyl and the "W" key to move it into position. I want to line it up with the weapons grip. I want this sphyl to vertically cover grip and give it proper collision.
Picture
   Now that I have the sphyl scaled down and lined up with the grip I want to make sure it is lined up properly. To make sure everything is lined up I can alter the mesh rendering mode by pressing the "H" key. This will turn my mesh into a wireframe or turn it invisible so all I see is the collision.

  Everything looks lined up and ready to roll. I am going to add another sphyl for the fore grip and get ready for the final phase.
   Just like before I rotate the sphyl and align it to the fore grip. This time around I want to check on the collision and make sure it isn't extending too far/wide. So What I am going to do now is press the "J" key and I can see the collision much better.
Picture
   It is now time to run a simulation. As you can see from my screen the TMP is not colliding with the floor more accurately. You are going to want to tighten up the collision around your weapon. Not too tight though. You are going to want your weapon to be able to move around. If the collision is too accurate it might cause the weapon to behave awkwardly. You want to give your weapon enough leeway move around the environment.

Simulating Physics

Picture
   When you are running your simulation there are a few things you might want to mess around with. The first thing would be the sim speed. For my simulation, I generally kept it between .5 and 1.0, there wasn't any need to go any lower or higer.

   The next thing you are going to mess around with is the "Poke Strength". When you're running a simulation you can "poke" your mesh. First you need to run the sim. Then during the simulation you can hold "Ctrl" and click on your mesh. This will give you an idea on how your mesh will react in game.

TMP - Physics PokeTest (UDK) from Danny Quesada on Vimeo.

   The default poke strength is set to 100. For something as small as the TMP you will want to tone it down. I set mine at 25, enough power to get the TMP moving without sending it flying.

Conclusion

TMP - Physics Test (UDK) from Danny Quesada on Vimeo.

  These are the steps I went through to give every weapon in the current build of the game. I hope this step by step guide was helpful to you.
​
- Danny Q
@Dannylv100
​

0 Comments

Level Design 101: Implementing the Crossbow

6/26/2013

0 Comments

 
Picture
  Hey everyone, it has been a while since I last had an update to my blog so in this post I am going to talk about something I have been working on for In Ruins. A few months ago we decided to incorporate a crossbow into the game. As the game designer it was my job to pick a crossbow and design the mechanics and gameplay around it.

   I looked at a bunch of different crossbows but I couldn't find one that made sense in this world. I needed something that was strong, versatile and had a distinct silhouette. I finally came across this amazing crossbow known as the TAC-15. This would become the base of the crossbow we plan on incorporating into our game.

   The purpose of the crossbow is to give the player a weapon that would allow them to take out opponents stealthily and effectively. We already have incorporated stealth mechanics in the game such as strangling opponents and crouch walking. It only made sense for us to incorporate a weapon that would help players be stealthy.

Modeling the placeholder

Picture
Perspective view of the crossbow inside of 3Ds Max.
   I began to model a placeholder model inside of 3Ds Max that would be imported into UDK for testing purposes.

 The model is based of the design of the TAC-15 crossbow. I made sure to keep this placeholder asset simple and relatively low poly. It needs to have a silhouette that sticks out from the other weapons in game.

  After the model is done I went ahead and gave it a simple rig to allow the characters in game to hold and use it.
Picture
Wireframe view of the rigged crossbow.
  Since the projectile is an arrow the rig does not need a bone in the muzzle. Typically when I rig a placeholder mesh I add three bones. I add one in the base of the grip, one under the barrel and the last one at the muzzle of the gun. This place older only needed two bones as this weapon doesn't have a traditional muzzle.

Importing into UDK

  Once the model is done and it is rigged and unwrapped I imported the FBX into UDK.At this point the coding for the weapon balance is completely off. At this point I open up the shooting range level I made so I can begin to properly balance this weapon.
Picture
Inside of UDK.

Balancing the weapon

   The counterpart of the crossbow is the sniper rifle. They are both long range scoped weapons capable of hitting targets that are hundreds of feet away. According to my research, a crossbow such as this one is accurate up to 100 yards. The sniper can strike targets up to 256ft in game but it does suffer from significant bullet drop.
   The sniper rifle has the most range of any weapon in the game. In theory the crossbow would easily be able to match it's range but it would be too powerful. To counter the power of the crossbow I have added a longer reload time and a charge up time(something like the Torque bow from Gears of War) before the crossbow can be fired. You might think that this makes the crossbow useless but to give the crossbow another strength we also made it silent. Enemies will not be able to hear it when fired, allowing players to eliminate targets from a safe distance without the enemy players noticing anything.

  The player can carry up to 24 bullets for the sniper rifle and the reload time is a few seconds. The player can only carry 8 crossbow arrows. The arrows are almost always a one shot kill to unarmored targets and the range is effective up to about 160ft. After 160ft the crossbow arrow will begin to lose power and begin to drop quicker and quicker, losing accuracy and stopping power. The crossbow might start out with less ammunition but it has the unique distinction of being the only weapon that can have it's arrows recovered (off of walls and the bodies of slain enemies) to replenish ammo.
- Danny Q
@Dannylv100
0 Comments

Level Design 101 : Terra Firma - Vehicle Capture the Flag

4/15/2013

0 Comments


Intro

   Welcome to Level Design 101! Today we are going to be taking a look at a Vehicle Capture the Flag (VCTF) map I made a few years ago called Terra Firma. This map was made in about a week a few years back for my Level Design 101 class. This was my first attempt at designing a VCTF map and therefore has some major issues and flaws in it's design. So with that in mind please understand that my knowledge of UDK and level design has vastly improved since the creation of this map.

Terra Firma

   The idea behind this map was to build a level on an alien planet that is in the early phases of being terraformed by a group of colonist traveling through space in search of a new Earth. The sky would be cloudy and gray while the ground would be barren and rocky. The red and blue team would be two competing factions fighting for control of this planet.

   With that idea in mind I set out to design the biggest map I had created. I made sure to build the entire map solely using the terrain editor inside of UDK. All the structures in the level are made out of either preexisting assets inside of UDK and BSP.
   Terra Firma is huge and is designed with vehicles in mind. There are a few different routes for players to take to reach the opposing teams base with one direct route leading straight to the opposing teams base in the center of the map that runs under the bridge through a valley.

   The terrain is rough and can be hard to navigate. Players are strongly encouraged to use a hover board when not in a vehicle. Running around on foot will leave you at a huge disadvantage.
Picture
Red base.
Picture
Central bridge.
Picture
Blue base.
Picture
The vortex over the map.
Picture
An outpost.
   Players must also be careful to avoid the large vortex that hovers over the center of the map. Any vehicle that gets too close will instantly be destroyed. This vortex was added to keep players from simply flying straight over to the other side of the map.

Vehicles

   There are three vehicles for the player to choose from. The first vehicle and most useful in navigating the rough terrain of the map is the Manta hovercraft. The second more direct vehicle is the scorpion dune buggy. It has a harder time navigating the terrain but her a powerful cannon for long distance encounters. The last vehicle is the Cicada bomber. This airship can fly over enemies and rain a salvo of missiles down on them.

   Vehicles are located all over the map. Players spawn near hangars and garages where vehicles are spawned. Cicadas are harder to find and are spawned on landing pads. Both bases have vehicles that can only be accessed by their respective teams. Any vehicle spawned outside of the base is neutral and can be accessed by anyone.

   Every player comes equipped with a hoverboard that can be accessed by simply pressing the "Q" key. The hoverboard can easily be combined with the jump pads in the level for quick speed boosts that will help the player escape danger.
Picture
Topdown of Terra Firma with a legend.
Picture
A clearer view of the terrain and paths.
Criteria
The level criteria is as follows:
- Spacing and Flow
- Cover Layout
- Lines of Sight
- Theme
Picture

No Clear Paths

Picture
Where do I go?
   As soon as the game starts there is no clear indication as to where the player is meant to go. The opposing team and flag is straight ahead, but there is no clear path. The only path clearly visible to the player is the direct path that runs under the central bridge.

   The direct path serves for an easy route for scorpions and mantas to take to reach the other side. The problem with this path is that it is just a big straight line! There is no way to change direction once the player decides to drive down this route. Making it an easy spot to be ambushed and attacked.
Picture
The only clear route in the game.
   The center path is essentially a valley that traps the player. It should have been made with a few different exits that lead to either side and lead the player to the vehicle depots on. As it is right now the center path does nothing but act as a direct route to the opposing team's base.

   Having a valley design isn't a bad thing if done correctly. If the valley is designed where there are ambush points on top and exits/retreat locations in the valley we could in theory design a very fun combat area in the map that will give players an interesting dynamic to play around with.
   Compounding these problems is the lack of any noticeable landmarks. Much of the terrain is just spread out unevenly, nothing on the map sticks out as something noticeable or useful. The central bridge is made to be something of a landmark, but the bridge itself is completely uneventful/useless. Noting of interest takes place on the bridge and there is very little reason for anyone to go there.
Picture
The bridge should be an important landmark on the map.
  With no clear routes but one and with the only real landmark on the map being completely useless. The problem with this map is that it wasn't built with the bridge or any landmark in mind. If this map was built with the bridge as it's centerpiece we would see every path/route flow into it, making it an important and essential area to control in the midst of battle.

Wide Open Spaces and Uneven Terrain

   This map is huge! It was designed for 15 vs 15 combat and it shows. The major issues with this large design is that we have so many wide open areas that are just uninteresting, bland and overall pointless.

  This is very problematic when areas that become rocky and steep that they are nearly impossible to traverse on foot or even with the scorpion. These wide open spaces always leave the player vulnerable to attack. There is no rocks or any sort of cover for players to maneuver their vehicles around. This leaves them wide open to attack, especially from aerial vehicles.
Picture
Is anyone there?
Picture
Should've taken the manta.
   Most of the time the terrain just becomes an obstacle for the player to deal with. Most of the time the manta is the best option for traveling because it can ignore the rough terrain. Luckily this map is heavily populated with mantas. The cicada is a viable option, but it is a support vehicle and can not properly engage targets for combat.

  The map is designed specifically for vehicular combat but this is all brought to a stand still when players are forced to carry the flag back to base solely on the hoverboard. With the way the map is designed (wide open spaces for vehicles.) we end up with areas that become shooting galleries. It takes luck rather than skill for a player to return back to base.

  The map has no areas that gives players on foot or hoverboards any sort of advantage. The map should've been designed with this in mind. At the moment it just suitable for the manta and no other vehicle. This makes retrieving the flag a very tiresome chore.

Combat

Picture
Being chased by enemy vehicles while on foot is not fun.
   Combat is vehicle heavy and is played in the traditional CTF style of one team trying to steal the opposing team's flag while guarding their own.
  The problem with the combat is that is is uneven and at times lopsided. If the player is not in a vehicle they are at a complete disadvantage. As stated earlier, the lack of cover for vehicles and people is very noticeable. Combat therefore feels as a bit of an afterthought. There is no real though into how to approach the opposing team. No matter which way you go you're almost always visible. There is really no lines of sight on this map as everything is exposed.

   There are some large hills and mountains around the map but those do no good when enemies can simply fly over them while in the manta. The overall tone of the combat is boring because the design of the map just leads to rushing. Players don't spend time trying to controls the bridge or vehicle depots. Areas like that are barley even distractions. Combat is direct and boring, it doesn't reward the player for trying a new approach or tactic.

Good Theme Poorly Executed

Picture
  The theme of this map was supposed to be something along the lines of two factions fighting for control of a fertile planet. Sounds good? Sure does, but whats that? Yeah somewhere along the lines we ended up with a map that is mostly gray, distorted and has some questionable art choices.
Picture
Everything is gray.
Picture
what kind of structure is this?
   The problem here is that most of the shifts in terrain are done through the terrain editor. What should have been done is a mix of the terrain with art assets of rocks and buildings to make it stand out, to give the map some sort of contrast. At the moment it looks really gray, everything looks like it is made of stone.

 Certain structures, such as the blue/red base should have been built from the UDK assets to make them looks like man made structures. The terrain should be the only rocky looking thing in the map.
   You know you have successfully executed a theme when a player can identify it immediately. Think about your favorite map from your favorite FPS. It looks exactly like what the name is. For example, in Call of Duty : Modern Warfare 2 there is a map called "Terminal" and it looks like an airport terminal.

  Even with something as abstract as a planet being terraformed by two rival factions there are no clues or hints as to what this map is supposed to be. Nothing about this map makes any sense in terms of it's theme.

How can we improve this level?

- Define clear routes of attack
- Make the map a bit smaller
- Define landmarks
- Smooth out terrain
- Redesign map to make the hoverboard viable
- Add cover for vehicles and players on foot
- Add more color to the map
- Make the theme of the map clear
Picture

Conclusion

Picture
   Looking back at this map I can honestly say that I had a great idea but time constraints and lack of know how lead to something that was less than spectacular. Fortunately we can learn a lot from looking back on our past mistakes. I see now that this map had potential, but without a properly thought out plan the execution will almost be flawed.
- Danny Q
@Dannylv100

P.S. - I have one more of my old levels to be analyzed for Level Design 101. I should have the next blog post up in about a month or so. I would like to do a mail bag post where I answer game/level design questions. Please feel free to comment/ask questions. Thanks for reading.
0 Comments

Level Design 101: Campaign Level Gameplay Breakdown

2/26/2013

0 Comments

 
Picture
   A few months back I was in charge of designing a campaign level for a project. The level I was working on was going to be a tutorial that slowly taught the player all the basics of the game. It would start out with teaching the player how to take cover, move, vault and to use a weapon. After that the level would transition into a stealth segment.

  Dev Note: This level is designed to average around fifteen to twenty minutes for most players. The time can vary depending on how the player decides to play the game. (Stealth, Combat, exploring etc).

Campaign

- Name: Welcome to the Jungle
- Single mission/Tutorial

Mission Location

- Unexplored Island off the coast of Japan
- Present day abandoned ruins of an old feudal era Japanese House
- First part of the map is interior and second half is exterior

Story

- On a remote Island off the coast of Japan a young and brash explorer Jake Valdez ventures into the jungle to find the rumored lost civilization of the Sun Emperor. On his adventure he not only discover the ruins of this forgotten civilization but he discovers a group of militant mercenaries that are destroying any evidence of this society. Anything of value is being taken and they burn down the rest. As Jake tries to escape he is capture and knocked unconscious. He now needs to escape captivity and find out who sent these mercenaries here in the first place.

- The story within the level consists of a captive Jake tied to a chair and locked in a room trying to escape from his captors. The player needs to escape confinement and escape the makeshift prison. Along his way he must eliminate any mercenaries he encounters or he will be killed on sight.

Visual Themes

- Decaying ruins of the Japanese Minka house
- Evidence of the house being torn down by the intrusive mercenary forces
- Contrast between the shipping containers/crates of the mercenaries and the natural quaint look of the Japanese architecture.
- The exterior of the house has a lush jungle that is contrasted by steel shipping containers.
- Makeshift guard towers and other structures brought in by the mercenaries

Mission Difficulty

Start: The first part of the mission is where we introduce the players to the world and setting. As the player begins to explore the environment they are slowly being taught to interact with the environment and use their abilities (sprinting, vaulting, taking cover, shooting etc). The only enemies encountered are equipped with a pistol.

Middle: The pacing picks up during this section. More enemies begin to engage the player and they player has more room and options on how they could handle the enemy encounters. At this point we introduce newer enemy units (machine gun and shotgun mercenaries) and new weapons (AK-47 and M500 shotgun).

End: The pacing slows down significantly, players are introduced to the stealth aspects of the game. They are encouraged to use stealth to take down the enemies in this area of the map. The layout of the map is still suited for a player that would rather run and gun. We encourage stealth but we make sure the player has options. 

Level Goals

- Teach the player movement/traversal (Running, walking, vaulting, climbing etc)
- To teach the player how to open doors and pick up items
- Teach the player how to take cover and combat
- Teach the player how to use weapons and melee
- Teach the player how to use cover mechanics for stealth
- Ensure that the player has learned all the game mechanics needed to play the game.

Enemy Units

   The enemies the player encounters are skilled mercenaries of various backgrounds and organizations. They operate in a pseudo military fashion. Using a variety of weapons and tactics to flank and outsmart the player.
- Pistol Mercenaries
- Machine Gun Mercenaries
- Shotgun Mercenaries

First Area - Minute 1-4

Picture
   When the levels starts the player finds themselves locked in a small room. In the room there is  table with a pistol on it. The player is instructed how to walk (W,A,S,D) and when they reach the table they are instructed to pick up the pistol using the E key.
Picture
   The pistol is currently unloaded and when the player reaches the door they can see into the other room. The door is jammed and can not simply be opened. The payer is then prompted to Melee (F key) the jammed door to open it. 
Picture
   With the door open the player is free to explore the next room.
Picture
   In this room the player can peak through the doorways and see that there is more areas to explore. Every possible exit is blocked by large crates and the player must find another way out.
   The stairs are also blocked by a few crates. It is at this point where we teach the player to take cover on these crates and then to vault (Shift key) over them so they can go up the stairs. Once the player vaults over these crates they will land on some pistol ammo and load their weapon as they head upstairs.
Dev Note: We wanted to keep this first half of the level really linear so we can ensure that the player does exactly what we want them to do. We make sure to quickly give the player more options as they progress through the level.
Picture
   Once upstairs the player has a few options on where they can go. They can head to the left of them or to the right.
Dev Note: The ceiling in this first area is completely intact. I though that the idea of having the ceiling open up as the player is moving through the building as a subliminal message. The more the move forward the more the sky opens up until they have learned all there abilities and are free to use them however they use.
   Before the player can make any decision they are confronted by an enemy that emerges from a room to their right.
Picture
   The player can take cover on the railing as the enemy stands in the open and opens fire. The player is taught how to aim and fire their weapon.
Picture
The player has options and is encouraged to explore.
   With the enemy defeated the player is now free to explore the second floor. They can head into the room where the enemy emerged from or they can head to the doorway. Either route they choose they will be lead into the next encounter.
Picture
The player is rewarded for exploring.
   If the player heads into the room nearest the stairs they can find a crate to vault over. If they do this they are rewarded with some ammo and a new weapon.
Dev Note: Weapon caches and collectible items are hidden around the levels to help encourage exploration.
Picture
   After finding the new weapon the player can continue moving forward and enter the next area of the level.
  If the player decides to head to the room before the first enemy they will find themselves overlooking the next area and will find a weapon (AK-47) tucked  neatly in the corner for them.
  In the room with the enemy the player can jump down back to the first floor. Once the player is on the first floor they will notice that they are in the area that they couldn't reach before. If they choose they can actually open the door and vault over to go back to the room they started from.
Dev Note: It was really important for us to keep this first part of the level small and confined so we can adequately teach the player the basics of the game. As the player learns more the level slowly expands more and more so they can explore and use their abilities better.

Living Room - Minute 5-10

Picture
 No matter which route they take the player will end up in a large living room area. This area has many varied pieces of cover spread out and it is fairly open. Many of the pieces can be vaulted/climbed. We want the player to be constantly moving on the battlefield.
   When the player enters this new area a group of enemies will enter the room. These enemies will behave much smarter and with more tactics compared to the first enemy encountered. These enemies will use their surrounding and take cover and will attempt to flank the player.

   There will be a total of five enemies. Depending on where the player enters the room there may be two enemies on the second floor with three enemies on the bottom floor or vice versa.
Picture
   The player has a wide range of options to engage the enemy. If they entered from the bottom floor they can take cover amongst some of the crates and pick up some grenades. These grenades are useful when used to  force enemies out of cover and into the open.
Picture
   If the player took the high road they are a bit more exposed but they have the advantage of seeing where the enemies on the bottom floor are at. The player needs to be careful because they can easily be flanked and charged by enemies while they are distracted and dealing with the enemies on the bottom floor.

   No matter where the player enters from they will only be dealing with about five enemies. As long as the player doesn't stay in one place too long they should be able to handle the situation and avoid being flanked.
Picture
Players can climb to the second floor.
   Players can use the vaulting mechanic to climb certain areas in the map. The pillars in this room are easily scalable and can allow for the player to make a quick escape. Enemy units can vault over most pieces of cover but they can not climb like the player can, so putting distance between you and the enemy by quickly climbing to the second floor can be a huge advantage.

Big Room - Minute 11-15

Dev Note: At this point in the level the ceiling is only covering up half of the roof. The roof coming disappearing over the players head is a symbol of freedom, it tells the player that they have almost escaped.
   The player once again has the option to enter the next area either on the second or first floor. No matter how they enter the next area they will once again be greeted by a squad of six enemies.
Picture
   Just like before the enemies will begin to spread out and try to surround the player. If the player is on the top floor the enemies will try and come around from either side as they lay down covering fire for their squad.
   From the top the player can engage the enemy from either side. Any enemy that is on the bottom floor should be easy pickings for the player. The player's main goal should be to reach the main staircase in front of them so that they can take control of the room. Atop the staircase they would have the best line of sight over the enemies in the room.
Picture
   The player is not at a disadvantage if they enter from the bottom floor. They are provided with much more cover and if they are quick they can make their way to a nearby column and climb it to reach the second floor.

   The key is for the player to utilize the cover. If they decide to just rush the enemies they will be surely be killed by the enemies on the second floor. The player must be smart about how they traverse through this level. In other words, if the player took the high route they are taking a more aggressive role and if they took the low route they are taking a more defensive role.
   From the top of the stairs the player is now in a dominant position and can pick off any stragglers left in the room. Once the room is clear the player can proceed onto the next area. There are two ways to get to the next area, there is a crack in the wall on the second floor that will lead onto the roof of a patio and there is the doorway on the bottom floor that will lead the player toward the outside of the level.

Patio - Minute 16-21

Picture
   The patio is a very wide open area that has a good mix of open space and readily available cover pieces. The goal for the player is to proceed to the jungle path and try to find a way to escape. This won't bee an easy task as another small squadron will be waiting for the player.
Picture
   The player as always is give a few options on what they can do. They can rush out and find some cover and immediately engage the enemy or they can climb one of the columns and attack from an elevated position. There aren't too many enemies and depending on how much of a commotion the player makes he shouldn't attract any back up.
   From a safe position the player can make quick work of the enemies that wander into this area. Unlike before the player is more than welcome to take a more active role and rush the enemies in this area.

Hill/Jungle Path - Minute 22-24

Picture
The entrance to the jungle path.
   With all the enemies defeated the player is free to advance to the next area.
Picture
   While venturing up the short jungle path the player will come across a lone enemy patrolling the area. It is here where we give the player the option to use stealth to take the enemy out. The player would be told to stay out of the enemies line of sight by hiding in the bushes on either side of the path and then instructed to stealth kill the enemy as he passes.

   This is a completely optional thing for the player and the player is not punished here if they decide to just shoot the enemy.
Dev Note: With all the art assets in place this area would be engulfed in very thick jungle and would allow for the player to hide in the plants to avoid enemy detection.
Picture
The player sneaks up on the unsuspecting enemy.
Dev Note: The player has a few stealth take down options. They can quickly choke there target eliminating them or take them as a hostage. Dead bodies can't be left in the open else they will attract attention and alert all nearby enemies to you.
Picture
If the player backtracks they can find some weapons and ammo.
   Aside from the single enemy in this area there isn't much else for the player to focus on. The path ahead is clear and it leads right into the next area, a shipping yard. The next area will allow for the player to fully utilize the stealth mechanics.

Shipping Yard - Minute 25-29

Picture
The shipping yard.
Picture
  The shipping yard is where we will strengthen and reinforce the stealth mechanics. The stealth option is completely optional and if the player chooses they can enter this area guns blazing.
Dev Note: It was crucial to make every area that could be stealth also capable of being combat. We didn't want to force anyone to play a certain way. The best thing is that you can alternate between stealth and guns blazing whenever you like.
Picture
Take the guard out with a flying stealth kill.
   One way to deal with the first patrolling guard is to wait for him to walk near the ledge and when he is within range the player will be given the option to do a flying stealth kill.
Dev Note: The flying stealth kill can be done whenever the player is in an elevated position over an enemy. It can be done in the middle of a combat scenario but it will leave the player exposed for a few seconds until they can get back on their feet.
   When the player enters the shipping yard they need to use the cover to stay hidden. The player needs to make it to the shipping container that is propped up in the back. The player can easily sneak past the guards or stealthily take them out without alerting anyone in the area.
Picture
Be sure not to alert the guard watching over the yard!
 When the player sneaking around the yard they need to be extra careful not to alert the guard in the makeshift watchtower. The player will need to time their movements and keep any defeated enemies out of the guards line of sight. If the player decides to go guns blazing they need to be careful to not be caught out in the open by the watchtower.
Dev Note: When an enemy is killed there body can be dragged away to be hidden. When you are dragging a body you are completely vulnerable to attack. It might be wise to take people hostage (human shield) and walk them to a secure location.
Picture
  When the player safely crosses the shipping yard they will reach the last area of the level.

Storage Room - Minute 30-34

Picture
You enter crouched and ready to stealth kill the first enemy.
   The storage room is designed with stealth in mind, but here we want to teach the player to take an enemy as a humans shield. Taking a human shield is a great tactic, you can use that shield in a moment where you don't have any cover or as a means to take a enemy to a safe distance before killing them.

   The player is forced to enter the storage room in a crouching position. This is done so they are already ready to take stealth take down the enemies inside.
Picture
   The player is in a small confined room, they need to make it out alive and they have a few options on how they could possibly escape.
Picture
Sneak over to the fortified position.
   The player can just start shooting but that would be foolish. The best thing for a trigger happy player to do is to find a safe place to ambush the enemy. If the player sneaks around to the right side of the map they can find a well fortified area with a shotgun.
Picture
Sneak around and go guns blazing!
   Once they are in place they can make quick work of their enemies. The player doesn't need to go this route, they can just open fire as soon as they enter but that leaves them at a disadvantage. You can easily be spotted by the guard in the doorway and he will call you out as soon as you're spotted and by the time you can fire off a shot the other two guards are on you.

   I wanted to create an area where it rewards exploration. Sure some players might be able to take out all the guards no problem but I don't want to necessarily encourage the "shoot first" mentality. If the player wants to go guns blazing that is fine, I just want them to think, to set up ambushes and find the best locations to really get a jump on their enemies. 
 If you decide to go the stealth route the first thing you need to do is take out the guard nearest the door. The player needs to remain crouched so the guard patrolling the doorway doesn't spot them. Slowly and methodically the player needs to eliminate the second guard and carefully sneak outside to wait for the third guard.

  The second guard is a bit of a tricky one to eliminate. If the player attempts to take him out he may be spotted by the third guard. It is best advised for the player to take the second guard hostage and walk them away behind some crates and then eliminate him. This way the third guard wont walk in on you trying to strangle the second guard.
   With the guards eliminated the player's only distraction is the final guard in the makeshift watchtower. The player can sneak past him when he isn't looking and climb up and take him out or they can engage him in a gun battle. If the player has already eliminated him from before than the only thing the player needs to worry about is climbing up the shipping container to escape.
Picture
End of level.
   The player climbs up to the makeshift watchtower and exits the level. With that the first level is complete and the player has used every single ability they have been given. The next level would have been a jungle environment that would once again give the player plenty of options on how they take out their enemies.
​
- Danny Q
@Dannylv100
​

0 Comments
<<Previous

    Dannylv100

       I am an Indie Game and Level designer, Consultant and host of Divercast.

    Space Image
    Picture

    Picture
    Picture
    Picture
    Picture
    Picture
    Picture
    Picture
    Picture

    Picture


    Submit a Question
    Picture
    Picture
    Picture

    Picture
    Dannylv100 on Twitch

    How to support Dannylv100

    Popular Podcast Episodes:

    Episode 21
    Episode 24
    Episode 25

    DLC Episodes

    Ep1 - Misc Movie Talk
    ​Ep2 - Gears 4 Impression
    ​Ep3 - A-plaque-alypse​

    Popular Indie Arcade:

    Indivisible
    ​The Night That Speaks
    ​Greedy Guns
    ​

    Popular Posts:
    Frosty's - Now on Itch.io
    How to make checkpoints....
    The Wanderer: A New Infe...

    Monthly Blog Archive

    WWP Appearance
    E3 Survival Guide
    ​Gears 4 - COG Hammerburst ​
    Knights vs Ninjas (Part 1)
    Halo 5: Warzone Accessibility 
    Halo 5: REQ Card Redesign
    ​
    New The Last of Us Enemy
    GDC 2014 Video Roundup
    ​Mass Effect 3: Tracker Class
    Mass Effect 3: DLC classes 
    ​Frosty's: Lost Levels
    ​
    Frosty's: Soundtrack
    ​Importing to UDK from Max
    ​Basic Checkpoints (UDK)
    ​
    Physics vs Scripted Events
    Picture

    Categories

    All
    Blog Post
    E3
    FF Level Design
    Flash Game
    Forge
    Forge Creation
    Freeze E Frosty
    Game Design
    Game Design Doc
    Gears Of War
    Halo 5
    In Defense Of
    Indie Arcade
    Indie Dev
    Iphone
    Iphone Game
    Itch.io
    Level Design
    Level Design 101
    Lost Chapters
    Podcast
    Steam
    Support This Site
    Thoughts
    Tutorial
    Twitch
    Udk
    Unity
    Youtube


    Archives

    September 2018
    August 2018
    July 2018
    June 2018
    May 2018
    April 2018
    February 2018
    December 2017
    October 2017
    September 2017
    August 2017
    July 2017
    June 2017
    May 2017
    April 2017
    March 2017
    February 2017
    January 2017
    December 2016
    November 2016
    October 2016
    September 2016
    August 2016
    July 2016
    June 2016
    May 2016
    April 2016
    March 2016
    February 2016
    January 2016
    December 2015
    November 2015
    October 2015
    September 2015
    August 2015
    July 2015
    June 2015
    May 2015
    April 2015
    March 2015
    February 2015
    December 2014
    November 2014
    October 2014
    September 2014
    August 2014
    July 2014
    June 2014
    May 2014
    April 2014
    March 2014
    February 2014
    January 2014
    December 2013
    September 2013
    July 2013
    June 2013
    April 2013
    February 2013
    January 2013
    December 2012
    November 2012
    October 2012
    September 2012
    August 2012
    July 2012
    June 2012
    May 2012
    April 2012
    March 2012
    February 2012
    January 2012
    November 2011
    October 2011
    September 2011
    August 2011
    June 2011
    May 2011

    RSS Feed

Powered by Create your own unique website with customizable templates.