dannylv100.com
  • Projects
    • Shrapnel
    • Flat Kingdom
    • Aero
    • Freeze-E Frosty's
  • Personal Projects
    • A Game In the Dark
    • Doom (2016) Design Test
    • 3rd Person Shooter
    • Forge Editor - Halo 5
  • Blog
  • Resume

Dannylv100's E3 Survival Guide: Tips for your first E3!

5/25/2016

0 Comments

 
Picture

Tips and Pro Tips make all the difference

   The Electronic Entertainment Expo is upon us once again. You probably know it as E3. Is this your first time going to E3? Every year people try and find tips and advice on how to explore the show. Like many others, I too have read these lists, and I have to say...they weren't all that helpful. If you want a great list of fantastic tips, you've found the place. Get ready for some tips and pro tips!

Obvious Tips

  These are the kind of tips you are going to find on any and every list about E3. These are the most basic and simple tips that you can find just about anywhere.

What to Wear

   E3 is a trade show for business to show off the latest coming attractions in games. Contrary to what a lot of people might think, E3 is not a fan event. There are a ton of business types walking around the convention center. If you are at E3 to just have a good time, dress casually. 

  If you are going to E3 to network, I would recommend business casual attire. You don't want to bump into someone you want to network with while wearing basketball shorts and a Goku button up! You want to make a good impression! After all you are representing your studio, channel or brand. 
​
Tip: If you are the type of person that sunburns easily, you may want to apply some sunscreen before attending the convention.

My recommendations

- Comfortable shoes (Don't come in toe shoes, you will just look out of place)
- Button up shirt (preferably a light color because it is usually very warm)
- Optional tie
​- Nice pair of Jeans/slacks 
- Sunglasses (LA is very bright and there is very little shade outside the convention center)
​
Picture
Dress for success!
Tip: E3 is a trade show, it isn't Anime Expo or Comic Con. Unless you are being paid to promote a product/service or game, leave the costume at home. 

What to Bring with You

Backpack

Picture
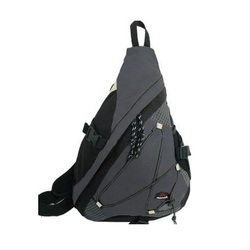
Cuscus Single Strap Backpack.
   You definitely don't want to show up to E3 without a bag. Chances are, you are going to end up with a bunch of stuff you can't carry. 

​   
The first few years I brought a standard Jansport, which had a lot of space, but it dug into my shoulders during the long walks/waits. I tried a messenger bag, but that too became uncomfortable.

   For the last for years I have been using a single strap backpack. It has enough space for my stuff/swag, while being comfortable enough for a long day's walk. I highly recommend looking into getting one of these bags.
​
   An excellent option for a single strap backpack is the KP Sling Bag, The KP sling bag is sleek and stylish, easily meeting the needs of a business casual scenario such as a convention or business lunch.

​  The KP sling bag is water resistant and features and padded interior great for tablets and other electronic devices. It also has a hidden compartment, great for your wallet/passport.

   Unlike most single strap backpacks, the KP sling bag can be worn on either shoulder. A fantastic feature for long days at the convention center or traveling around town. 
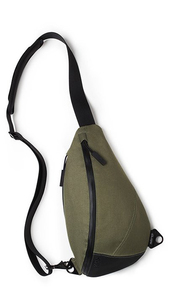
Picture
KP Sling Bag.

Snacks 

   You are going to want to bring water. A refillable thermos/bottle or a couple of plastic water bottles would be a good idea.If you run out, there are a couple of water fountains around the main halls where you can always refill. If water is not your thing, a sports drinks work too.

 You are definitely going to be offered energy drinks while you're attending E3. I am kind of against them, since they will just make your thirstier and possible jittery. I wouldn't pack any to be honest. Too expensive and water does the trick for me.
​
Picture
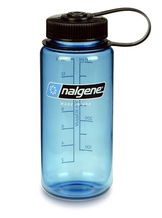
Refillable plastic water bottle.
Obvious Tip: Water fountains are located around the outside of either hall. These spots are ideal for getting a drink or refilling your water bottle.
​
   Where snacks are concerned, I usually just pack something simple like Apple/Pear slices, banana or chopped carrots. Healthy snacks that will keep your energy up and not slow you down. Beef Jerky and mixed nuts are also a great option if you want to keep the hunger at bay while also restoring your energy. You also can just pack a home made PB&J. All these items are easy to consume while waiting in line or just relaxing outside the con.
​

Tip: Don't pack any food items that need to be heated up or cooked in any way. Please don't bring food with a very pungent smell either!

Business Cards

Picture
Business cards in a steel carrying case.
   If this is your first E3 I can't stress how important business cards are. If you are an up and coming youtuber/streamer or a freelance game developer, a business card is essential. I would recommend carrying your business cards inside of a steel card case that will keep them safe and allow for easy distribution.

  You are going to need to carry more then ten cards with you on any given day. Be sure to keep your spare cards inside of your backpack/purse etc. If you are wondering how many cards you should get printed, I would estimate that 200 would be more then enough for all three days and after parties. Make sure to get them printed a couple weeks in advanced. You don't want to have to pay for rush delivery/printing. 
​

Know the Halls

Picture
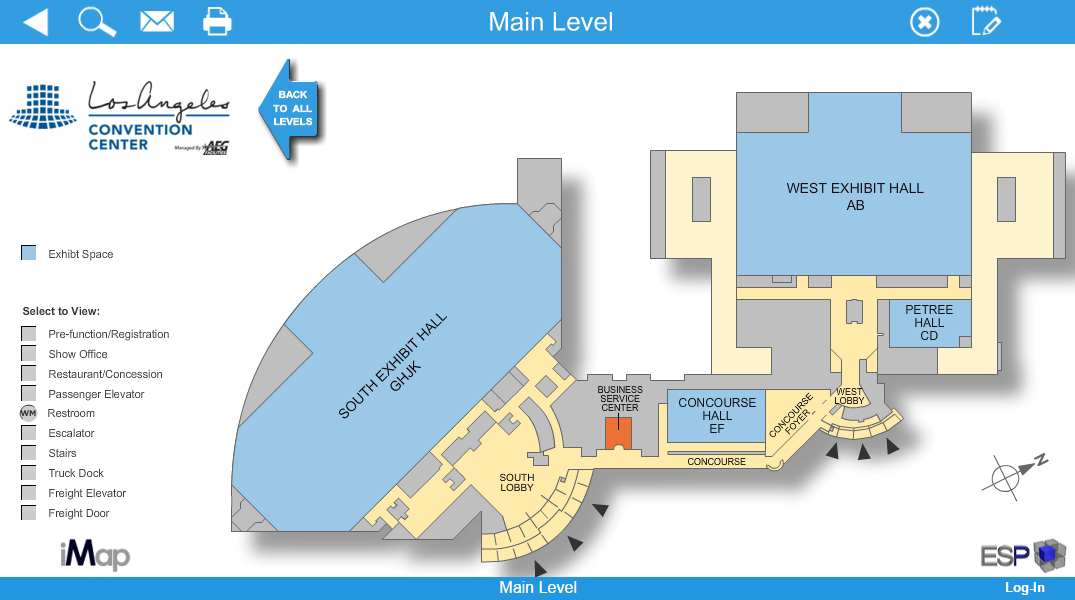
   Use thisinteractive map and Virtual Tour of the convention center to familiarize yourself with the halls. Just remember, this handy tip, the West hall is the one closets to Staples Center. 

Figure out Where to Eat In Advance

   In recent years there has been a plethora of lunch trucks that can be found along Figueroa street, across from the convention center. Lunch trucks vary in price, so expect to spend around 8-12 dollars. Sometimes, game studios may provide a lunch truck that will give out free food/snacks as part of a promotion! These lunch trucks are a great way to save some money, but don't count on them being your main source of food.
​

Picture
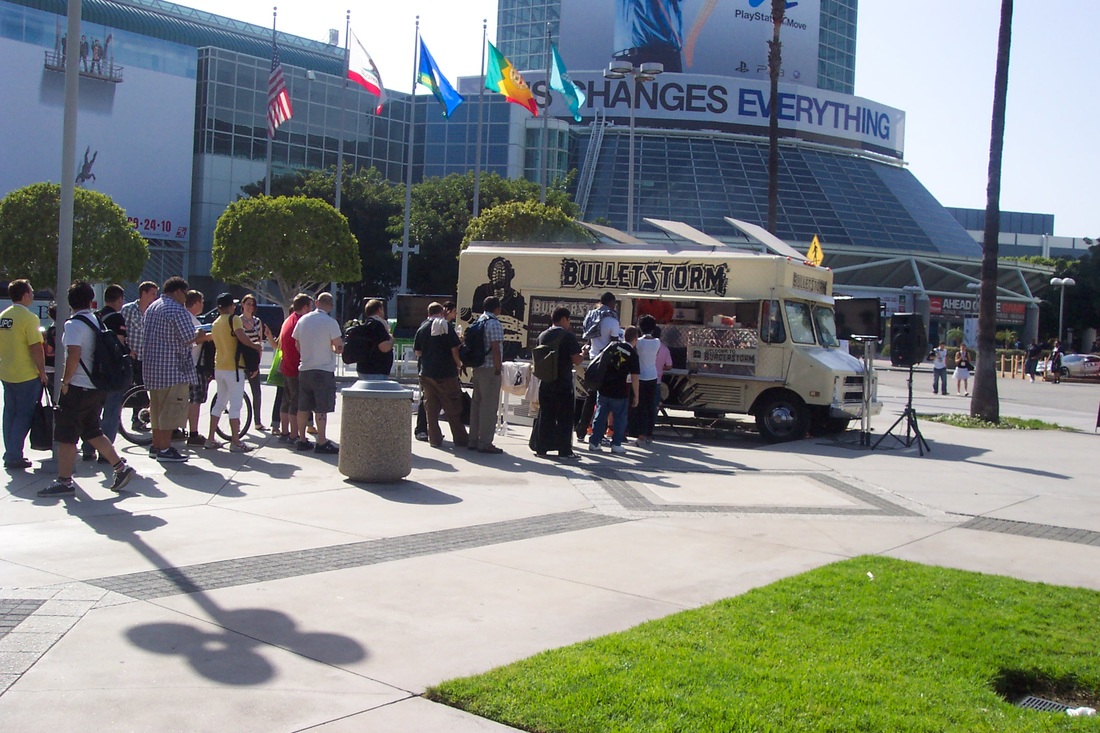
E3 2010 - Promotional Bulletstorm lunch truck giving out free hamburgers.
   LA live, which is near the convention center is full of places to eat. These are sit down places and can be a bit pricy, keep that in mind if you are on a budget. If you had to eat at a place in LA Live I would recommendLucky Strike. It has a nice atmosphere and their lunch menu that isn't too expensive while also being a short walk from the West hall.
​  
Picture
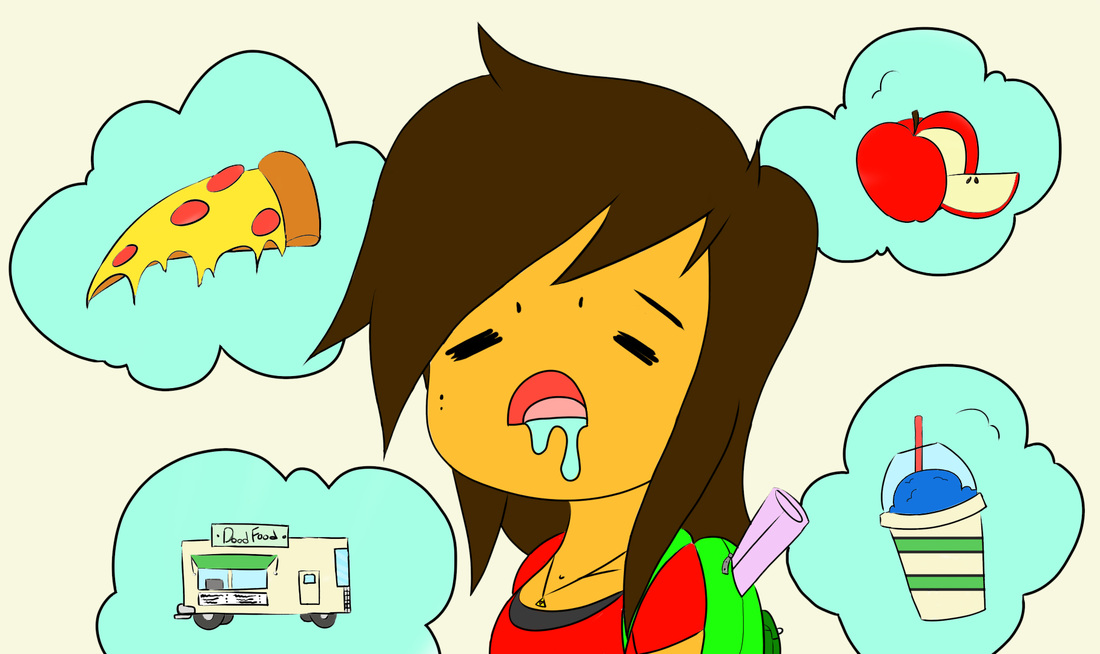
"What am I going to eat?"
   Whenever people ask "What is good in LA?" you might get an answers like, Pinks, In-N-Out, Phillipes etc. Just be aware that none of these places are near the convention center! Feel free to eat there, but not during convention hours. You will waste a lot of time/gas/money traveling all the way to Pink's.

​   
Make sure to do your research beforehand! Zomato makes it easy to find places around Downton Los Angels with their lunch and dinner search options. Make sure to plan out where you're going to eat before you make the trip to the show floor!

Protips

  These are the tips that you will only get from someone like me, am E3 veteran. These tips will give you the edge over the unprepared masses that flood the halls.

Networking

   Networking is one of the most powerful things you can do while attending E3. You are going to be surrounded by thousands of people in every field of game development. Indie game designer, Concept artist on huge AAA projects, HR and PR personnel. I really hope you brought along your business cards!

  But when is networking approriate? How hard should you hustle? When and where is best to meet people?

On the Show Floor

   Waiting in line is a great time to network. Think of it this way, you and the people in line already have a lot in common.
   All you have to do is start up a casual conversation. If the person is down to have a friendly chat, chat away!
   What are you to talk about?
- The demo you're waiting in line for
 - What game/etc are most excited for?
- What do they do in the industry (animator/designer etc)? 
- ETC
   When you are about to part ways make sure to seal the deal and hand them your business card.
​ 
Picture
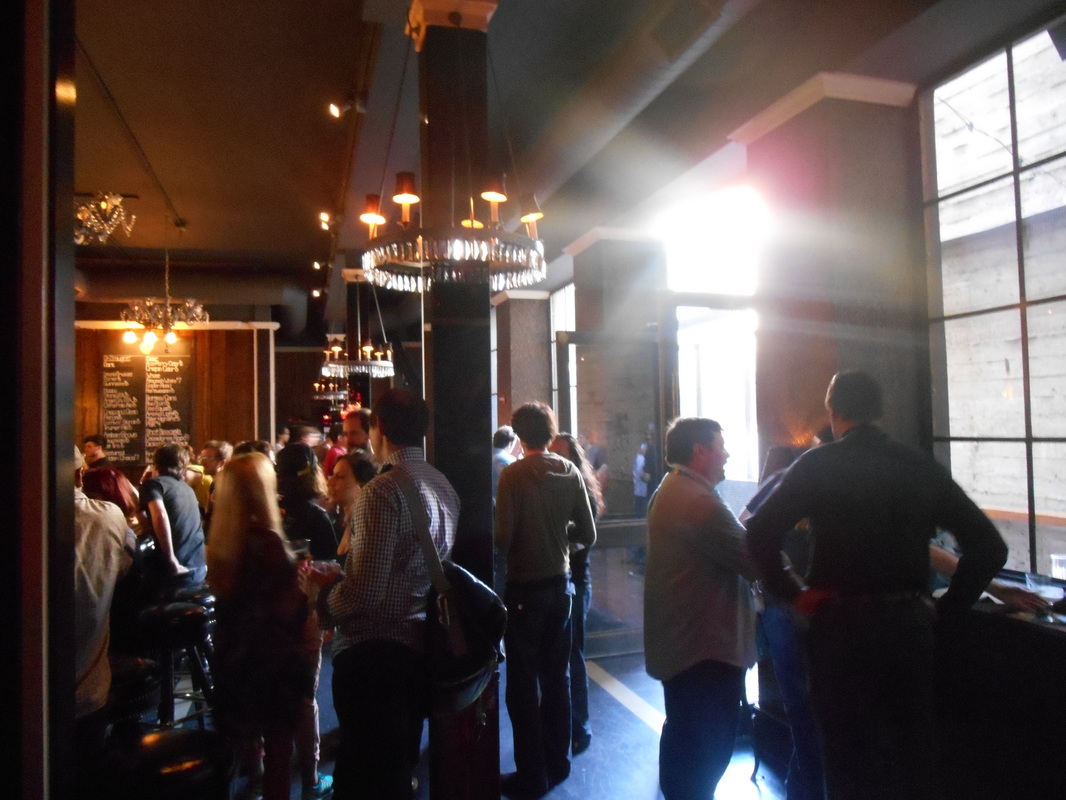
Gamedev Drinkup at the Golden Gopher (E3 2014)
Pro Tip: Read the situation, in a line that is an hour long wait you might not want to be stuck next to someone you angered/annoyed!

At an After Party 

  The show floor isn't the only place that you can socialize. Every year E3 has a ton of after parties, and most of them are accessible to anyone attending E3. How do you find such parties? One thing that always works for me is to google search "E3 Parties (Year)" and you will find a list of all the parties that will be going on that week.Or better yet you can follow the E3 party guide on twitter or check out their website. Most of these events are fairly easy to attend. Don't be surprised that a few may be exclusive. 

   One such event that anyone over 21 can attend is the Gamedev Drinkup. I would recommend the gamdev drinkup because it is a great way to network and meet interesting people. This event is very laid back and casual. Just people drinking and talking. This is a great event for people that are just breaking into the game industry or are fresh out of a game design college.
​
Tip: Be sure to bring your E3 badge to the party! Most parties require a badge for entry. Don't leave it at your hotel or car!

Get Connected!

   If you've been busy hustling and socializing at E3 you probably got a stack of business cards! What do you do now? Simple, start connecting with these people! What I normally do is I find them on Linkedin or twitter. I sit down at my desk and go through the business cards of all the people I met. I send requests to the people I had a good conversation with. It doesn't hurt to message everyone you collected a card from.​​
Picture
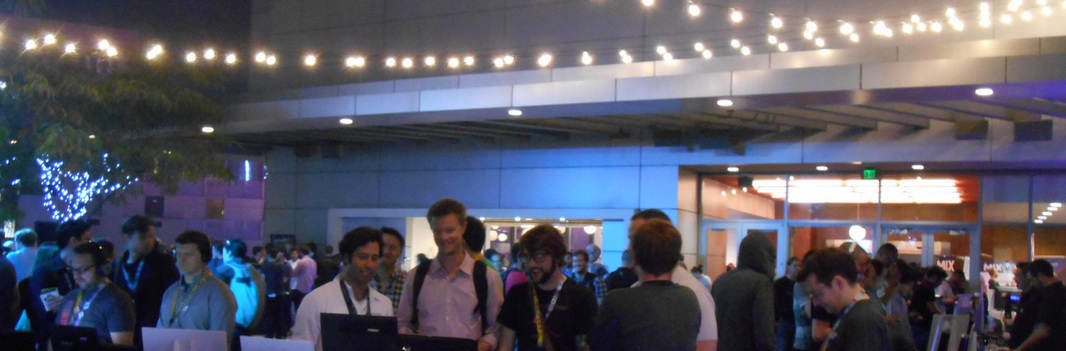
The MIX - Media Indie Exhcange (2015)
Pro Tip: Make sure to wait a few days to a week before you try and connect with anyone on Linkedin. People are busy during E3 and are more likely to see your request after the dust has settled. If you want to connect with them right away, follow them on twitter as it is a much more casual means of connecting.
​​
   Here is an example of a short message I would send "Danny would like to connect.  Great talking to you about your upcoming project! " Keep it short, simple and add a personal touch. The personal touch helps them remember who you are. It is very common for people to get spammed with tons of connection requests, you want to remind this person who you are, where you met (In line, At an after party etc) and what you were talking about. This will build a bond, refresh their memory and ensure that these people will accept your request. ​

SWAG: Dos and Don't 

  E3 is a place full of swag (Stuff We All Get), but not all of it is worth it. In fact some of it will just weigh you down and hold you back. One item I learned to avoid are the over sized convention bags. At best they help you carry all of your stuff, at worst they get in the way and the strap will rip causing you to drag them all over the place.
​
Picture
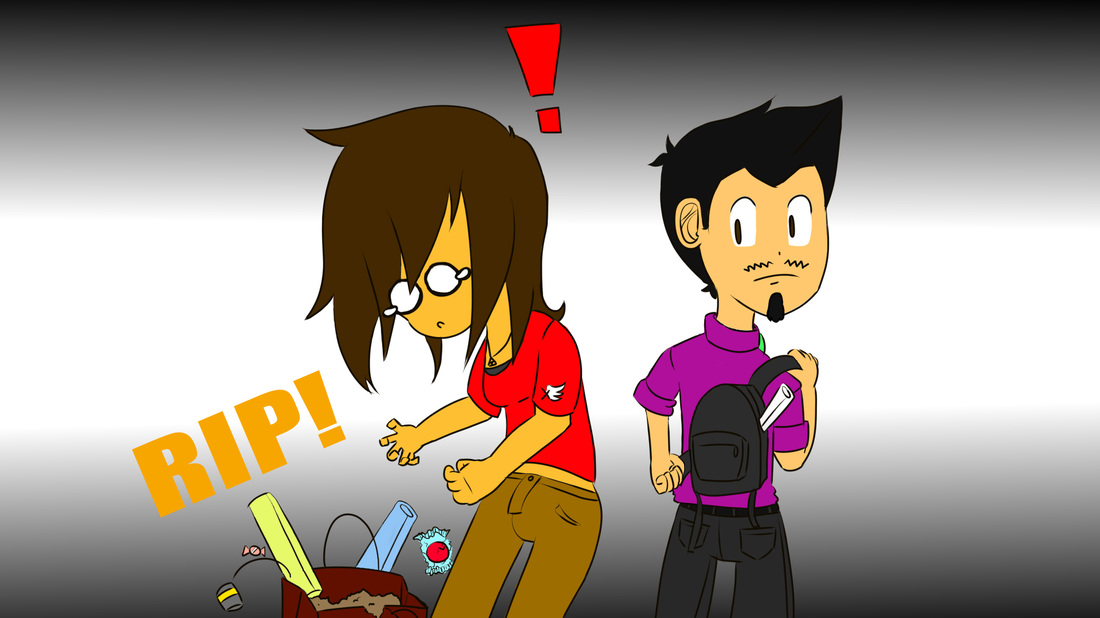
Avoid the large convention bags!
   If you are offered something that you don't want, politely decline. It is a major pet peeve of mine to see people receive something and simply toss it in the trash or on the ground. Just say "No thank you". Not hard to do. 

DO: Keep An Eye out for Hot Ticket Items

   There are some hot ticket items at every E3. The Skylanders booth onced raffled off an E3 exclusive figure that collectors would love to get their hands on. I was fortunate enough to win one. I held onto it for a while and I sold it online for a cool hundred mil.
​
Picture
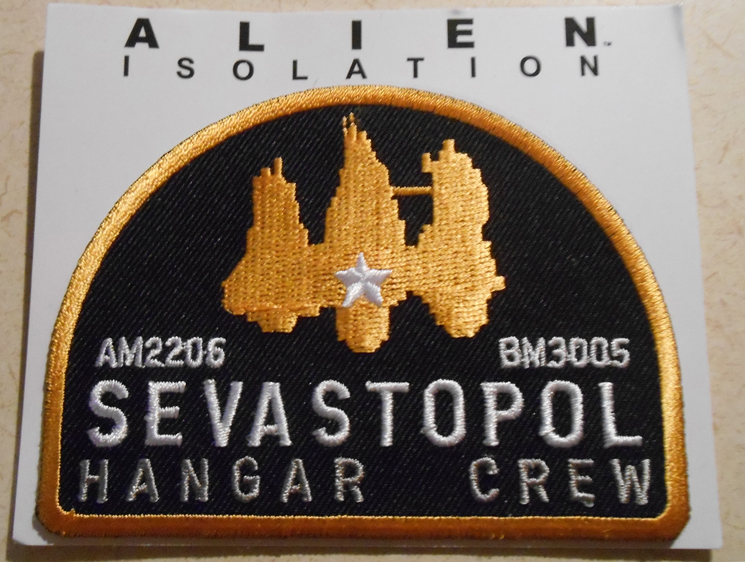
E3 exclusive patch from Alien: Isolation.

Hot Ticket Items

- Art books and Art Prints
- Collectible Figurines
-Plushies
- Patches/Pins and Coins
​- USB drives

   Of course there are a plethora of shirts, magnets, lanyards and novelty items. I still have a can of Overcharge (the energy drink from Sunset Overdrive) somewhere in my room. 

(Please) DON'T: Be a SWAG Hog or a Whiner

   Swag is free, but that doesn't mean you are entitled to all of it, nor does it mean you should take more then everyone else. Be aware that most of the time the people working the booths are only allotted so many items to give away each day. Sometimes they run out or are done handing out items for the day. 

  I bring this up because every year I see someone get annoyed or angry at this fact. I've seen a grown man raise his voice at someone because he didn't get a free T-shirt. Don't be that guy. Don't be the guy who takes too much or whines when they run out. Fact of the matter is, you will survive without a video game shirt.

Not All Lines Are Equal

   I have waited maybe, half an hour to an hour before to go into a private theater to play a demo and see some extra footage, and those times have always been worth it. Sometimes they give you a shirt and some cool swag.    

   Everyone is going to tell you this "Waiting in line is a big part of E3" and "Long lines are to be expected". Don't fall for these traps.  One year, there was a huge AAA game I was excited for.  My friends and I deiced to wait in the 3 hour line, because you know, it had to be worth the wait. Guess what happened. When my friends and I finally got into the  private theater, they showed us the trailer of the game and gave us no new info. No demo, no new footage, no gameplay, nothing. It was a three hour wait! The only thing we go four our trouble was a T-shirt. 
​

Picture
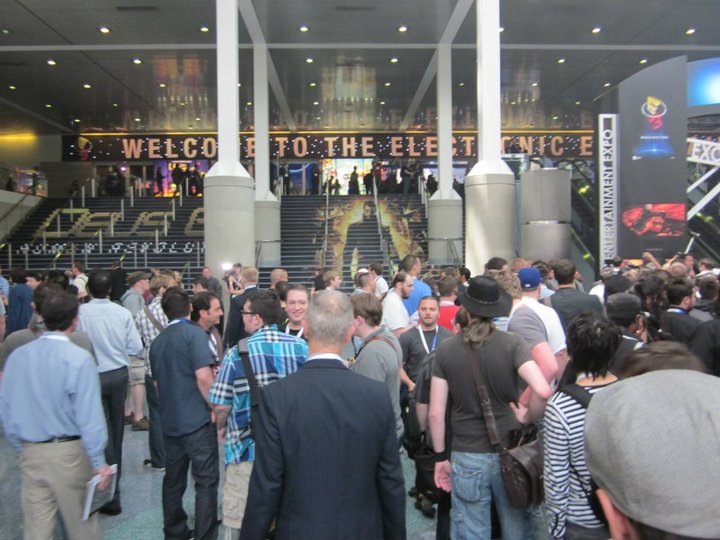
Line to Enter the south hall. Photograph provided by Jeremy Lobdell.
   How can you avoid a similar fate at E3? Well if you have a press pass that usually cuts waiting in line in half or can even gets you into these private screenings without having to wait.

   How does someone with a general access pass avoid this fate? Easy, just ask someone working the booth. Ask them how long the wait is, if you can play the game/if there is some cool swag etc. The people working the booth will fill you in. I've avoided waiting in lines to nowhere ever since. 
​

Lyft/Uber 

​  Are you signed up to Uber or Lyft yet? No? Good! You might want to hold off until the week of E3. Both of these companies offer sign up bonuses for new customers that can be really handy if you ever get stranded in or around the convention center.
Picture
   First time customers to Uber get a free ride (up to $22) if they use the promo code FEELING22. Uber has also maintained a presence at E3.
Picture
 Sign up to Lyft with this link and get $50 in credit added to your account! I would also suggest using lyft line as a great way to get from your hotel to the convention center for cheap. 

Sign up to Lyft with referral code DANNYLV100 and get your first ride FREE.
​

Get Your Coupons Ready

Picture
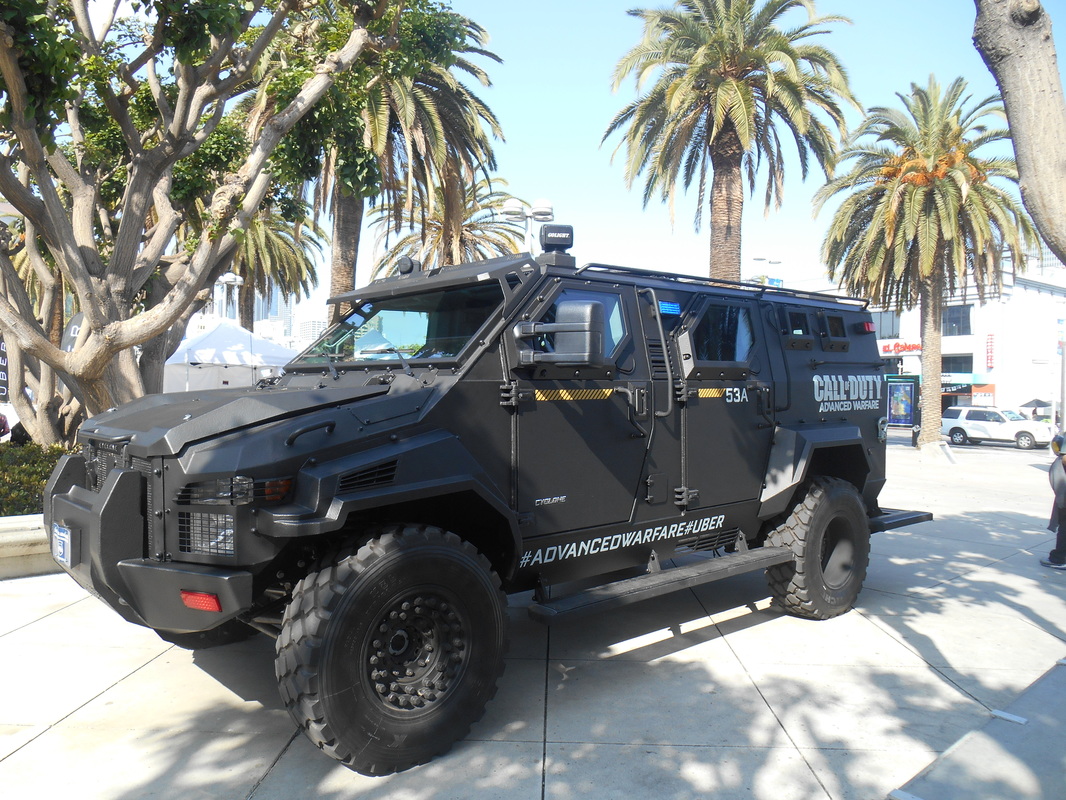
As a promotion one year, you got to ride in an armored car if you signed up with Uber at E3.
   If you have any coupons from Lyft/Uber sitting somwhere, now would be a good time to use them. I have a couple coupons for free rides I got a few months back that I am saving up in case of an emergency scenario. If the apocalypse were to happen tomorrow, guess who has a free ticket out of LA.

Know Your Route: Public Transportation

   Everyone seems to have the idea that public transportation in LA is terrible. That is not too far from the truth, but you aren't going to be traveling all over LA, just to the convention center. Lucky for you, there are a couple of ways to get to E3 by public transportation!
​
   LA Metro can help you find a route to the convention center. Give them a call @ 323.466.3876. Let them know your starting position and your destination. The kind folks at LA Metro will be happy to help you plan your route, free of charge!

Public Transportation Routes

   Metro Bus 81(orange bus) goes through Downtown Los Angeles and then travels straight down Figueroa. This bus makes with multiple stops near the convention center.

​LADOT DASH shuttle bus F will take your through Downtown LA and straight to the convention center for only 50 cents! It stops running around 6 pm, so be aware!

Metro Expo line (light blue train) has a stop at PICO station that will leave you a few blocks away from the convention center. ​

Selfie Stick (For the Youtuber/Blogger on a budget) 

  Selfie sticks aren't just for selfies. Whenever I need to film something out in the field I use my an everyday HD digital camera and my selfie stick. If you are an up and coming channel, you might not have the budget or crew to get the shots you need. A selfie stick is compact, light and requires very little set up. Selfie Sticks are also very affordable when compared to most tripods, boom mics and camera mounts.
​ 
Picture
Trying to record freehand vs using a selfie stick.
    With a selfie stick and some creativity you can take some great shots of the show floor. You can also use it when conducting interviews and filming vlogs. If you see any footage for this site or the youtube channel, you can bet it was filmed with my selfie stick.
​

Note: The show floor is very loud! If you want to film a vlog or interview, try and do it somewhere outside or away from the show floor.​

Portable Charger

Picture
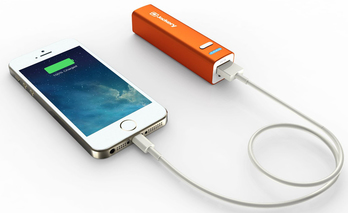
Jackery phone charger.
   One thing you might want to look into it is a portable phone charger. You are going to be using your phone a ton. Taking pictures, making calls, texting, networking etc. Your battery is going to die. I've seen it happen every single year.

​   Sure, they've added some phone charging stations, but did you bring your charger? Do you have time to wait your turn to charge your phone? The answer is no, you want to be on the show floor, playing games, meeting people and enjoying your E3 experience!

   
   This portable charger is slightly bigger then a lipstick and neatly fits into your backpack or purse (and comes in a few different colors). A portable charger will allow you to charge your smart phone on the go, it can definitely save you or a friend in a pinch! Especially if you are from out of town or country and you rely on your phone to get around (map, travel, etc). Don't be the guy looking for an outlet at the after party! Be the guy who is prepared and makes it back home safely!
​
Portable Charger Options: Jackery Mini Premium, Anker Portable Charger, Astro Candy Bar Sized Charger

Use this Shortcut!

   There is an outdoors walkways that connects both halls. This walkway will take you to the entrance of the South hall and West Hall. Most people are going to use the main walkway, but you don't want to do that! As a veteran of E3 I can tell you that the main walkway takes a lot longer to get between the halls. We are going to be talking anywhere from 10-15 mins if you walk from the south hall to the west hall via the main walkway. 
Picture
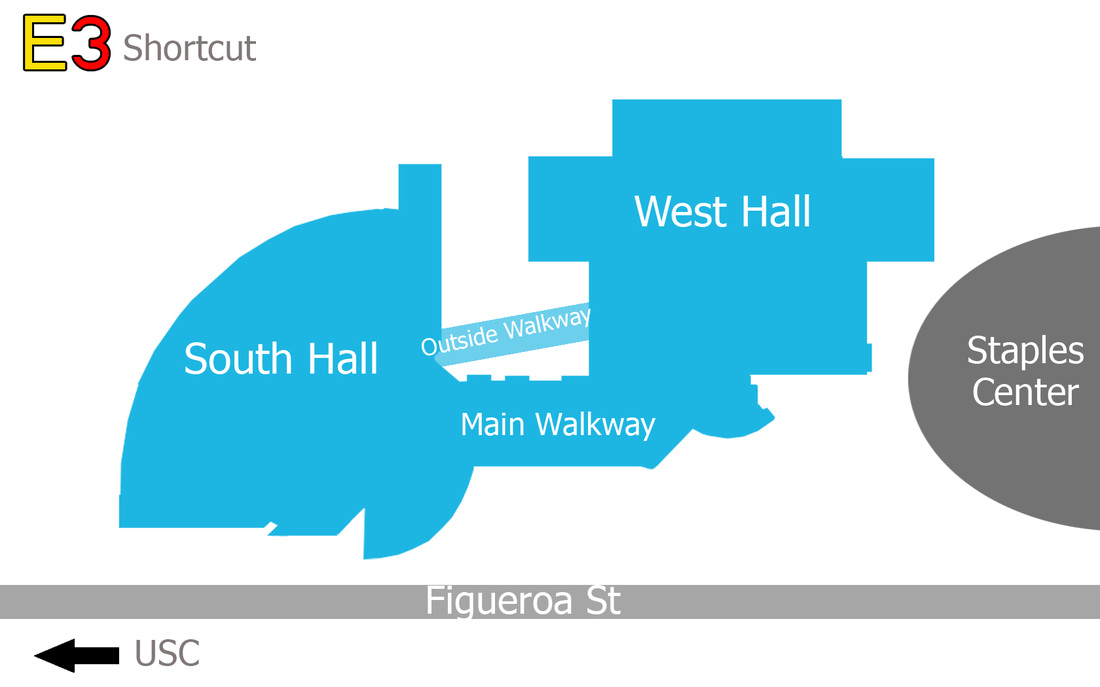
   If you take the outside walkway, you're looking at around 5-8 mins. You might be thinking "So what?" A few minutes makes all the difference if you need to get to a meeting or get in line to have an art print signed! Trust me on this one.

See You at the Show!

   With all of these tips and pro tips, I think you are now ready for your first E3! Just remember to have a good time. You should have learned to avoid lines to nowhere, figure out where you are going to eat, what to bring and to network.

​   If you found any of these tips helpful in any way shape or form, please feel free to tweet me and let me know! If you see me at the show don't be afraid to say hi! I really enjoy meeting new people and socializing. You can probably catch me at one of the Gamedev drink ups or Indie meet ups! Have a great E3! 

Artwork was provided by Xfactor 521. Follow her on Twitch, Twitter and Deviantart! Be sure to give her a follow!
Picture
Social Media.
Picture
All photographs of E3 were taken by Dannylv100 except where noted

   Do you have questions, comments or concerns? Email us at [email protected]
Follow us on Tumblr, IndieDB, Twitter, Mixcloud,Soundcloud,Twine, instagram and Youtube

- Danny Q
@Dannylv100​
​
0 Comments

Twitter for Game Developers

2/26/2014

0 Comments

 
Picture
   I have been using twitter for the past few years now and something that I realized is that it is a great way to keep up to date on everything game related. I have seen many fellow developers scoff at twitter. Most of the time people tell me it is a big waste of time. The thing is, yes it can be. But most of the people that struggle to make the best of twitter are doing it all wrong!
   One of the issue I encountered when I first joined twitter was that there is no real explanation of what to do, or how to begin building your network. It doesn't even explain how hashtags work or why they're important.

   I spent the first few months just talking to myself. My tweets weren't reaching anyone and I didn't know why.

Picture
   What I plan on doing is talking you through the basic steps of use. I am not going to tell you how to get a ton of followers, but I do intend on sharing some tips and explaining to you how hashtags work. If you're new to Twitter these tips will help you learn how to start finding and connecting to people.

For Game Developers?

   When it comes to social networking you would be surprised to know that twitter has a very large community of game developers. There are indie devs (such as myself), industry vets, concept artist, animators, designers and everything in between.

  
In the last hour I counted 59 tweets using the hashtag of #GameDev and that was only in English! What I like about twitter is it's format. It trims what is unnecessary from social networking. It is all about getting an idea out and sharing it instantly with a community.

Local Broadcast vs Tagged Tweet

   There are two kinds of tweets you can make. There is what is known as Local Broadcast and then there is a Tagged Tweet.
Picture
Local Broadcast tweets are only seen by your followers.
A Tagged Tweet is a tweet that has a hashtag attached to it. This means that when someone searches for that hashtag (keyword) the tweet will appear in searches and can be seen by people who are not directly following you.

   A tagged tweet is the best way to reach a wide audience and be discovered. It is also a good way to find other people that share similar interest wit you. In this case it would be other Game Industry individuals.
   Local broadcast is when you tweet a message that has not been tagged. This means the tweet is only visible to your immediate followers and is not likely to be seen in the search results of Twitter.
Picture
Adding a hastag allows your tweet to be seen in searches.
Picture
   To summarize this, imagine that local broadcast is like telling a room of people a message whereas tagging a tweet is like being on a soapbox on the side of a busy street. It is hard to reach people and build a network when you're tweeting to an empty room.

   If you're attempting to network and share your work, you're going to want to tag your tweets so other people can find you. If you are solely using LB, you will find it hard to attract and find connections because no one can hear you.

How to use Hashtags

   Hastags are essentially keywords. Adding a hashtag to your tweet will make it appear in searches. People can click on a hashtag and they will be taken to the results of a search where they will see other tweets that have the same tag. Hashtags allow your tweet to be seen by everyone all over twitter.

   A hashtag can be added by pressing shift + 3 on your keyboard. This will add the number sign to your word and if done correctly the  word will turn blue and become a link. For a word to be properly tagged it needs to be one word. For example, tagging #Game Art is incorrect because only the word Game would be tagged. You would need to write it as #GameArt for it to properly appear in searches.

For Example:

Picture
   I composed a tweet that simply said "Check out my Oscars". I then added the tag of #Aquarium and attached the URL of my video.
PictureThe search results.
   Now that my tweet is live I can click on the hashtag or type into the search bar the tag (#Aquarium) and it will take me to the search results with every tweet that has the same tag.

Pro Tip:
Click on a game related tag to find people in the game industry.

   We might not want to see every tweet there is. By default the twitter search is set to "Everything".

   If we wanted to just find my video or even other videos we can specify out search by selecting the "Videos" option in the sidebar to the left.
Picture
Tip: Use this feature to find People,photos, videos and etc.
   We now see the same search results list, but now it has been narrowed down to only include tweets that have the tag #Aquarium and a video.
   If we were to apply this to a game related tag, such as #ConceptArt or #GameDev we would come across relevant tweets, photos and videos. This helps us find users and groups and users that we would want to follow and connect with.
Picture

Retweeting

Picture
Shout out to the guys at Word of Level Design.
 Retweeting is the act of forwarding a tweet. So think of it this way, someone tweets something such as "Great article on new modeling techniques" and they have 100 followers. Now if you go to their tweet and select the Retweet function you will now tweet that tweet to your followers, and if you have 100 followers that means it has reached 200 people.

   Retweeting is a great way to help a tweet build momentum, It helps the original tweet get more exposure. It is always a good idea to RT (Retweet) something that you want your followers to see, such as a great article,tutorial, video or portfolio.


Who to follow?

Picture
   When you're new to twitter and you you're just starting to build you're network you might not know where to start. There are plenty of people, studios and developers to follow. Where do you start? I made a simple list of people to follow to help build your network and provide you with the industry info you will need.

Daily Hashtag Specials

Picture
   On certain days of the week there are special hashtags that you can use to connect and network with other game industry people. Here are two of the best ones that I have used to network with.
Picture
An example of what a Follow Friday tweet would look like.
Screenshot Saturday - Every Saturday it has become a tradition of sorts to tweet a screenshot of something you are working on with the hashtag #Screenshotsaturday. It can be a new level you're designing, an environment, Zbrush model or even a short video.
Follow Friday -  Follow Friday takes place every Friday. This involves the act of tweeting out #FF followed by the twitter name of the person or persons you would like others to see and follow.
Pro Tip: Use Follow Friday to discover new people and to promote and recommend other developers in our community.
Picture
A typical Screenshot Saturday tweet.
Tip: Do not tweet images of your work if you're under an NDA. Tweeting an image of a game that is in development may be a violation of company policy and may result in your termination. Only tweet images of your personal work.

Useful #Hashtags for Game Developers

Picture
Use these hastags when you tweet.
  When you're tweeting about your work, there might just be a hashtag for it. Do you want to discover some art? Do you want to find some interesting people to follow? Well check out some of the tags listed above. These tags are all used by people in the game and animation industry.

   The hashtags you use are not just limited to these. You can get more specific when you search and tweet. You can search for something such as #EnvironmentArt and #Maya and that will narrow down the search and help you find people and images relating to environment art in Maya.
Tip: Don't just Retweet and read, share! Be a part of the community!

   Twitter is a great way for a game developer to network. Everyday, every hour there are people talking about games, learning and sharing new technique or being inspired. The game industry has a very big presence on twitter and for an artist, student or veteran it is a great way to stay informed and grow.
​
- Danny Q
@Dannylv100
​
0 Comments

How to Create Physics based Collision for a Custom Weapon

12/20/2013

0 Comments

 
Picture
  Welcome to my latest blog post. I know it has been a while since my last post, please forgive me as things have been really busy for me on a few different levels. Luckily a lot of good things are in motion and hopefully I will be able to share them with everyone in the near future.

   Something I have been working on recently is making physics assets inside of UDK. I have been working on making a rag doll for the characters of  my current project (Formerly known as In Ruins). I also decided to go ahead and build all of the physics collision for the weapons.

 Giving weapons physics based collision will help them react realistically in your game world. In this tutorial I will go over how to build proper collision for your weapons and what collision works best and why.

Getting Started

Picture
  The first thing I did after opening up UDK was to Fully Load my Weapons package. So make sure to fully load whatever package you have your weapon saved in (Example: My_Custom_Weapon).

  After that I open up the the MP_Weapon_TMP package and I select Meshes. Inside I see three things. I see the Skeletal mesh TMP, the Static Mesh TMP and the Static Mesh of the TMP magazine. Double click on the Skeletal mesh of your weapon so the skeletal mesh open up.
Picture
   Your weapon requires 3 bones for this to work. Your gun should have b_gun_root, b_gun_lefthand and MuzzleFlashSocket.

   After you've made sure you have these bones right click on your skeletal mesh and select the "Create New Physics Asset" option.
Picture
  Once you clicked the "Create a New Physics Asset" option a dialog box will appear. It will ask you where to save the package and what group/name. For this I made sure to keep it with the rest of my TMP files so I did not change the package. For grouping add it to the Physics Assets folder, if you do not have one create one by typing in PhysicsAssets (all one word) or Physics_Assets.

 As far as the name goes make sure to start it off with PA (for physics assets). Your name read as "PA_NameofYourCustomWeapon_Physics".
Picture
Just keep all this information set to it's default setting when building physics for weapons. You will have to change a few things for characters.
  After you punch in the information another dialog box will appear. This one has a few options for your newly created physics asset. When creating a Physics Asset for a weapon such as the TMP all you need to do is leave everything set to default.

 Once you're done reviewing this dialog box click "OK" to immediately open up the PhAT editor (Physics Assets Editor).

Inside the PhAT Editor

Picture
   The PhAT editor should open up immediately and the first thing you should see is your weapon surrounded by a few wireframe boxes. These boxes are built onto the bones of your weapon. These boxes are the default physics collision of your weapon and for the most part you will need to delete them.
Picture
   For my weapon the bone I want to use is the bone known as "tmp_b_root". This is my root bone and is the only bone that will give me the proper collision I want. The other two boxes will not properly interact in the world when we run a simulation.

   If you're not sure what collision box is  connected to your root bone, look to the right of your screen and click on the section that says "Tree".
Picture
   To run a simulation inside the PhAT editor press the "S" key on your keyboard. At the moment your weapon is bound to be flipping around and possibly the mesh may be breaking apart and getting stretched. This is because the collision is not set to the proper bone (In my case, the root bone). To end the simulation press "S" again.
Picture
   Start deleting the bones that are not your root bone. A dialog box will pop up, just click ok. As long as you are deleting the non essential collision boxes their shouldn't be any issues. The only remaining box should be attached to your root bone.
Picture
   Run another simulation. The result should be your weapon falling down and colliding with the floor. If you get a result similar to the one picture above this means you are ready to start adding proper collision to your weapon.

Know your collision

Picture
   There are 3 types of collision primitives you can use to build physics collision for your weapon. You have the all purpose box, sphere and sphyl. I call the box all purpose because it can be used for just about anything, and it can be scaled into a rectangle. I do not recommend using the box for your custom weapon because the box is the most costly piece of collision to use.

  The Sphyl is what you are going to want to use for majority of your collision. In my experience, spheres are best suited for characters and you probably wont be using them for any weapons.

Setting up Collision

Picture
   The next step is to select your root bone. You can tell it is selected because it will be highlighted a yellow color. You want to build your collision on this bone, so what you want to do is go to the menu bar atop the screen and select one of the new collision buttons. For the TMP I want to use a sphyl, so I will choose to add a new sphyl.
   Now that I have my sphyl added in I need to get rid of the box. Just like before I will go ahead and select the box. Becareful, select the box  directly by clicking on it or by selected "box" in your properties tree. Delete the box and and leave the sphyl behind as the only piece of collision.
  I am going to use this sphyl as the top part of my TMP (The slide and barrel components). So what I am going to do now is scale it down with the "R" key. Going to pull the sphyl closer together until I get it to wrap around the the top portion of the TMP.
   Now that I have the top portion of the TMP enclosed in collision I am going to click on the "Add new collsion..add sphyl" and add another sphly to my TMP.

  The next step is to rotate it into position. Using the "E" key to rotate the sphyl and the "W" key to move it into position. I want to line it up with the weapons grip. I want this sphyl to vertically cover grip and give it proper collision.
Picture
   Now that I have the sphyl scaled down and lined up with the grip I want to make sure it is lined up properly. To make sure everything is lined up I can alter the mesh rendering mode by pressing the "H" key. This will turn my mesh into a wireframe or turn it invisible so all I see is the collision.

  Everything looks lined up and ready to roll. I am going to add another sphyl for the fore grip and get ready for the final phase.
   Just like before I rotate the sphyl and align it to the fore grip. This time around I want to check on the collision and make sure it isn't extending too far/wide. So What I am going to do now is press the "J" key and I can see the collision much better.
Picture
   It is now time to run a simulation. As you can see from my screen the TMP is not colliding with the floor more accurately. You are going to want to tighten up the collision around your weapon. Not too tight though. You are going to want your weapon to be able to move around. If the collision is too accurate it might cause the weapon to behave awkwardly. You want to give your weapon enough leeway move around the environment.

Simulating Physics

Picture
   When you are running your simulation there are a few things you might want to mess around with. The first thing would be the sim speed. For my simulation, I generally kept it between .5 and 1.0, there wasn't any need to go any lower or higer.

   The next thing you are going to mess around with is the "Poke Strength". When you're running a simulation you can "poke" your mesh. First you need to run the sim. Then during the simulation you can hold "Ctrl" and click on your mesh. This will give you an idea on how your mesh will react in game.

TMP - Physics PokeTest (UDK) from Danny Quesada on Vimeo.

   The default poke strength is set to 100. For something as small as the TMP you will want to tone it down. I set mine at 25, enough power to get the TMP moving without sending it flying.

Conclusion

TMP - Physics Test (UDK) from Danny Quesada on Vimeo.

  These are the steps I went through to give every weapon in the current build of the game. I hope this step by step guide was helpful to you.
​
- Danny Q
@Dannylv100
​

0 Comments

Level Design 101 : Corridors - Capture the Flag Map

12/19/2012

0 Comments


Intro

   Welcome to another edition of Level Design 101. This time we are going to be taking a look at a capture the flag map I made a few years back called Corridors. This map was made in the span of roughly a week for my first level design class. At the time this was my first attempt at a CTF map and I originally designed this map inside of the UT3 editor but midway through I shifted it over into UDK, which ruined all the weapon spawns.

Corridors

   Corridors is a map that features three direct and indirect routes into the opposing teams Base. The left and right side corridors are divided up between a bottom and top section. The top section is an array of platforms that lead directly toward the enemy base but features no cover. The bottoms section has places to take cover and fire at the opposing team safely. The map is divided in the center by a pit of death with a pool of lava at the bottom.The main hall features a bridge that connects to either corridor and leads players safely over the pit of death.
   Corridors was made with the very basic CTF rule of having at least three different routes to reach the opposing teams flag. It features a left and right corridor that leads straight to the opposing teams spawn and base. These corridors also feature a jump pad that will lead players to floating platforms that provide a quicker route at the cost of cover.

   The main hall way is the fastest way to reach the enemy flag but it is separated by the pit of death. The player is mostly covered here by some walls and has an easy to access jump pad that will propel them over to the other side. The main hall also house the main bridge that connects both of the floating platforms in the left and right corridors. 

   The flag can be found in the main hall sitting on a raised platform. The platform can be accessed by a jump pad or by crossing a small bridge from either corridor. 
FUN FACT: The pit of death is a 1,000ft drop. Originally the height of the fall was meant to kill the player, the only problem was that far too often players would wall in with too much health and inadvertently survive the fall. This lead to a kill volume being added to ensure whoever falls in dies.
Picture
One of the corridors.
Picture
The main hallway.
Picture
The main bridge connecting both bases.
Picture
The pit of death.
Picture
Some cover in the corridors.
   When this map was being built inside of UT3 the theme was going to be something that fit into the world of UT. Once it was moved into UDK most of the original textures and assets that I was using were no longer available. The theme then became Corridors, whatever that means.
Picture
Topdown inside of UDK
Picture
Red and blue represent each teams spawn.

Criteria

The level criteria is as follows:
- Spacing and Flow
- Cover Layout
- Lines of Sight
- Theme
Picture

Forced to go with the flow

Picture
The flow of the map is very direct.
   The flow of this map is very straightforward and direct. As soon as you spawn you are basically heading straight out of your spawn toward the enemy base. The problem with the way the spawn are set up is that they only serve as an area for the player to spawn. The players base serves any other purpose. Players spawn and head straight into the battlefield. The spawn should also function as a relative safe zone that allows for players to regroup and gather their thoughts. 

   The problem with this straightforward design is that the player can not change direction. Once they choose a corridor to traverse they must remain committed to reaching the end. There isn't enough flow in these hallways to allow the player to double back or to even change direction. Once they begin heading toward the enemy base they must stay on course. If they were to turn around they will surely be shot by enemy players.
PictureThe ceiling isn't properly spaced.
   The floating platforms in the level were meant to grant the players more options and freedom. The problem with these platforms is that they are poorly implemented into the design of the level. The platforms are only accessible though the use of a jump pads and therefore and usually out of the reach of the player when they might want to use them.

   The main corridor features a bridge that leads to the opposing flag, the huge issue here is that the ceiling is too close to the player. It really restricts what the player can do, they can't jump or dodge and with the resulting splash damage of explosives this bridge can easily become a hindrance to anyone trying to make use of it.

Picture
   You want your level to have flow. You want it to have many different currents that guide your player around the map naturally. The way the corridors in the map are designed like a river, it only has one strong flow to each end. The problem with this design is that it also has nothing that indicates what team/base each area belongs to. When the player spawns they have no idea where they are or what team they are on. We can fix this by adding some lights, symbols or even making the color of their spawn that of their respective team color ( i.e. red or blue). As the map sits right now everything is gray and it doesn't help the player understand where they need to go. It is very easy to get turned around in a map like this.

Lack of Soft Cover

Picture
   At first you might look at this map and think that there is a lot of cover to be found. You would be right, but the cover here is placed so haphazardly it is apparent that there wasn't much time put into it.

   Most of the cover is found in the main left and right corridor. The areas that are lacking cover are the quick pathways that float above the three paths. Originally this was intentional. The idea behind this was that the player would take a risk with the barren path so that they can have a direct route toward the enemy base or to their own base when they are carrying the flag.

Picture
   The way the cover is set up in the corridors is poor at best. Most of the cover has no real flow which leads to the player awkwardly transitioning from piece to piece. This happens because each and every cover piece is just stuck to the wall. There is no piece of cover in this area that allows for circular motion.

   Each piece of cover here is solid, there is no blending of soft cover and when we have certain pieces that look like they might be low enough to jump over it turns out that almost every cover piece can't even be jumped over. The ones that can require two jumps in quick session to pull off.

Haphazard lines of sight

Picture
The main hall has a very cramped feeling to it and the lines of sight suffer from it.
   Lines of sight are very important in a competitive first person shooter. The way this level has it's lines are sight set up are all wrong. The main hall has very cramped lines of sight while the left and right corridors have very cluttered lines of sight.
PictureThe cover clutters the players line of sight.
   The left and right corridors are very cluttered. If the player were to stand and look straight ahead they would have no clear indication on where the enemy base was located or where they enemies were coming from.

   If you take a look at the image to the left all you will notice how those cover pieces obstruct the players line of sight. From this point in the level the player can't properly asses their situation and therefore they are wasting time trying to figure out where they are and what they need to do instead of actually enjoying the map.

Picture
The player can fire into the opposing spawn from the bridge in the main hall.
   To give an example of an area that had a very clear line of sight was the bridge in the main hall. From the top of the bridge the player can see the opposing teams flag and even fire missiles into the enemy spawn. This area is poorly designed and gives whoever is on the main bridge a distinct advantage over the enemy team. This area would greatly benefit from some soft cover that would obstruct the players view of the enemy teams spawn. It is clear that this part of the map wasn't given enough thought when implemented.

Theme?

Picture
  So I mentioned earlier that the theme was "corridors", whatever that meant. So as you can probably tell, the theme is just plain awful. There is no consistency in the level, it lacks any sense of style. Just look at the walls that are supposed to appear ornate with a repeating texture that is all over the place. The ceiling looks like the kind of cement you would find out behind a liquor store and the main corridors are just generic tile.
PictureThe player spawn.
   The player spawns are just some metal texture that doesn't help the player identify where they are in the level. The major problem here was that the theme wasn't established. "Corridors" is not a theme. That is like saying that "Rocks" or "Trees" is a theme.

   A theme is when or where the map takes place. For example if we were to say this map was going to take place in the corridors of a sunken cruise ship that has washed onto a desert Island, that is a theme. The theme is what ties everything in the map together in terms of what it is going to look and feel like. The theme needs to have some sort of subject involved in it. It needs to be instantly recognizable.

   So as you can tell this is not a pretty map. It looks awful, it looks like there was no thought into how it was going to look at all. It needs a real theme to tie it all together. We know that this level has a "Pit of Death" and that can serve as something that we ca build on to incorporate into our theme.

How can we improve this level?

- Define what the theme is!
- Make the flow more fluid and circular
- Make the routes not as direct
- Give players options to retreat and fall back to
- Limit the number of double jumps
- Improve the lines of sight
- Add soft cover
- Improve the spacing of the map
- Make the player spawn more clear with use of colors and lights.
- Add color,symbols or landmarks to help the player identify where they are in the map.
- Better spacing in all the corridors


Picture
Capturing the flag!

Conclusion

Picture
   I made this map a few years ago and it was my first CTF map. At the time I couldn't see all the mistakes I was making. It was at this time that I was really playing it safe and I tried to design the map as close to the rule book as possible. I learned later that all rules toward level design are not that strict. The rules to level design can be bent if it allows for a more fun and engaging experience.
- Danny Q
@Dannylv100
0 Comments

Level Design 101 : Chambers - Deathmatch Map

11/17/2012

0 Comments


Intro

  So I wanted to share some of my knowledge of level design with you. When I first started using UDK I knew I wanted to become a level designer. My first few outings as a level designer were admirable but weak. I want to take apart a few of my first early levels and break them down, analyze them and most importantly learn from them. In this series of blog posts I will critique and scrutinize these maps while handing out tips on how to improve your level design.

Chambers

   The first map we are going to look at is called Chambers. It is a deathmatch map I made a few years ago when I was still attending college. I made it in the span of a week for a homework assignment. It supports 8 to 12 players and it is a fairly small map.
   There are five large rooms on this map. It is designed to keep the action moving from room to room and to discourage camping. Each room is designed with a different theme in mind. Players will have to keep moving quickly or else they will become a sitting duck as enemies can attack from all sides. The thin diagonal corridors provide a fast way to get from room to room but are also dangerous chokepoints for anyone caught in them.
Picture
   Each room has a different theme. The room themes are as follows: Jungle, Storage, Cave, Invasion and the Main Hall. The storage room is full of crates and items. The cave is wide open with some cover. Invasion is full of crates and a few items. Jungle is spacious and open. The main hall is in the center of these rooms and can be accessed by the four main halls. The main hall is very empty and drops down into the center corridors that connect all the main rooms together.
Picture
Invasion room.
Picture
Main Hall.
Picture
Storage Room.
Picture
Cave.
Picture
Jungle.
Picture
Topdown of the level with the main hall in the center.
Picture
Topdown of the level displaying the diagonal corridors.

Criteria

The level criteria is as follows:
- Spacing and Flow
- Cover Layout
- Lines of Sight
- Theme

Picture

Spacing and flow disaster

   Let's talk about what went wrong here with this level. If you watched the gameplay video you might have noticed that many of the areas in the level are really narrow and crowded. In a FPS game like Unreal you want there to be plenty of room for players to run around. The design itself was made with this in mind but was poorly implemented.
Picture
Some areas are too cluttered.
Picture
This hallway is barely 256 units wide.
Picture
There is not enough room in these corridors.
   Hallways should be 512 units wide to comfortably support a 2 player skirmish. The size of the hallways connecting the 4 main rooms is 512, length and width. The diagonal intersecting hallways are barely 256 units! That is half the recommended unit size! Small tight spaces coupled with the poor placement of cover really make this map feel smaller than it actually is.
Picture
The blue circles demonstrate the circular flow of combat.
Picture
Picture
Picture
   Squares when done right can be great for cover and when used properly they can really create dynamic flow, a circular flow that will have both players moving around the map. The problem with Chambers is that it was designed to keep the flow of the map fast and aggressive but they way it plays out is just a mess. Many of the cover pieces require players to double jump over them so they can reach items that are hidden on stacked crates. Why do we have this platforming element in a FPS level? How easy will it be for players to jump and double jump on stacked crates when they are being shot by hostile players?
Picture
Picture
  Two of the main rooms, the Storage room and Invasion both have crates stacked in a manner where they can be jumped onto and climbed to access items. The problem with this is that the jumping isn't intuitive at all. In one of the hallways leading to the jungle room there is a low piece of cover that looks like it can be easily jumped over but it takes two jumps to clear! Anything that requires two jumps to clear is a "Skill Jump". These kinds of jumps should be kept to a minimal.

Cover is a mess

PictureThe tentacles detract from the level.
   Cover is very important in a first person shooter. The problem with this level is that there is cover everywhere but most of the time it is useful by chance and in no way is it useful in a meaningful or tactical manner.

   What I am saying is that when you're running you're just running. Very few pieces of cover allow for the player to consciously utilize it. Some areas are completely devoid of cover, which in turns makes them deathtraps. 

PictureHallways are too narrow.
   The places where cover is most lacking is in the diagonal corridors that connect the rooms together. The worst part of all is that tat the cover that is in these halls impede the player. The player can only continue moving forward when they are attacked, if they try and retreat they leave themselves exposed.

   Cover is just dropped in the map with no rhyme or reason. The Cave and jungle room have the least amount of cover but still lack any real purpose. The best way to describe the cover in these levels is "Cluttered'. As mentioned earlier there are parts where cover pieces are stacked with items set on top of them, as if the player is supposed to climb on top and retrieve them.

Lines of Sight

Picture
The cover piece should be moved to the left. As it is now it obscures the players line of sight.
   The lines of sight in this level are really obscured. Lines of sight need to be clear when you're designing a first person shooter. Having a clear line of sight allows for the player to make decisions quickly. Having a clear line of sight allows for players to figure out where they need to go and how to get there.
Picture
  The level suffers from some poor decisions design wise. The corridors leading to the cave and jungle room are wide and mostly clear, however the corridors leading to the other two rooms are narrow and restrictive. You don't know what you're getting yourself into when you're walking into those rooms.

   The result of poor lines of sight is a very chaotic gameplay experience. Players are running around the map, not because they are having a good experience but because they are trying to figure our where they need to go and what they need to do. The way cover is laid out, combined with the terrible lines of sight lead to some very frustrating encounters and experiences.

Conflicting themes

  When I first made this map the theme I was going for in my head was kind of complicated. I wanted this level to be the interior of an alien spaceship. Each room would be a different theme representing a different environment that the aliens have recreated aboard their ship. The hallways are supposed to be the alien ship's corridors and the main hall was supposed to be the alien command center that over looked the whole map.
Picture
What is the theme?
   With all that being said, do it look anything like that? The answer is no. It doesn't really look like anything. I mean you can kind of see what I was originally going for but without me telling you what it was would you have known what the hell I was doing?

   When you build a level you want to build it with a certain theme, look and fell in mind. If you make a level called "Jungle" and you're inside a mansion the whole time it makes no sense. People will call your level house and not jungle. If I would have stuck to one central theme in level that would have improved it greatly. What is the strongest theme in my level? Let's say it was the cave theme. If I were to have made a level that was the interior of a cave that would have been much better than having a single room strangely transition into a room with tentacles coming out of the walls.

How can we improve this level?

- Fix the spacing issues. Make sure there is enough space for the players to move around it
- Widen the diagonal hallways and keep checkpoints to a minimal
- Make the doorways wider
- Pick a single theme and stick to it
- Place items on the floor. Avoid platforming
- Cut back on double jumps aka "Skill Jumps"
- Better placement of cover
- Make lines of sight clearer
- Make cover dynamic!


PRO TIP: Make sure to sketch your idea down on paper first! When I started this map I did it all inside of UDK. I should have set the dimensions on paper before trying to figure them on inside of UDK.

Conclusion

Picture
   This was one of the first maps I made. It was during this time I took my first steps into UDK and my career as a level designer. Looking back at this map I can easily spot all the mistakes I made. The purpose of this post is for all the up and coming designers to read. I want people to read this and walk away with a better understanding of what it takes to bring a level together. I will be sure to breakdown a few more of my older maps in the near future. Stay tuned to get the latest info from my blog.
- Danny Q
@Dannylv100
0 Comments

Grayboxing Made Easy

3/18/2012

3 Comments

 
Picture
   In this tutorial I will show you how to take your gray box in 3D Studio max and import it into UDK as a Builder Brush with the use of a MaxScript.

   This is a great way of speeding up the level design pipeline. In my experience I found that grayboxing the level inside of 3Ds max to be vastly superior in terms of time and speed over constructing the graybox inside of UDK. Making a graybox inside of UDK solely with the Builder Brush (BSP) is very time consuming and it can be difficult to get the BSP to do exactly what you want it to do. 

   The problem with grayboxing inside of 3Ds Max is getting the graybox into the engine. This MaxScript solves that issue. I have just started using it and I felt the need to share it with my fellow designers.
Picture
Click on the image to go to the T3D Exporter site.
  This Max Script is called the "T3D Exporter" and was created by Daniel Hodvogner. This is his script and in no way am I claiming it as my own. I am just making a tutorial for it's use.
 To get the T3D Exporter go to his website http://commonbit.com/wiki/t3d_exporter_eng
Once there go to "Download" and where it says "For 3Ds Max" download it to your desktop.
Picture
Download it to your desktop.
  Once it is on your desktop open up "3Ds Max".

  In 3Ds Max go to the top tool bar and find where it says "MaxScript"
Picture
MaxScript is found near "Rendering" and "Customize"
  In the drop down menu select "Run Script".
Picture
  Once you selected "Run Script" the "Scripts" Folder will pop up. Take the "T3D Exporter" script from your desktop and drop it into this folder. Now whenever you go to Run Scripts you will find the "T3D Exporter".  After that close the window.
Picture
Drop the T3D Exporter script in here for future use.
  Inside of 3D Max quickly create a teapot from the Standard Primitives. This teapot should be centered with it's X,Y,Z values as 0. Make the radius of the teapot as 64. We set the radius at 64 so it is easier to spot once is in UDK.
Picture
Make sure it is centered!
 Now with your teapot selected go to MaxScript > Run Script  > Commonbit T3D Exporter
Picture
A window should open up that reads "T3D Export" hit the export button and when it prompts you to name and save name it "Test" or "Test_Teapot" and save it to your desktop.
Picture
Save your exported teapot to your desktop so you can find it easily.
Now open up UDK and at the top tool bar go to Brush > Import
Picture
Open UDK > Brush > Import
  Once you go to import go to your desktop and select your teapot. It should say something like "Test_Teapot.t3d
Once you select it UDK will ask you if you wan to merge faces or import it as a solid piece. Import it without merging. Once that is done you wont be able to see your import.

  Hit Crtl + A and you should see your wire frame teapot appear as a BSP.
Picture
Crtl + A
Now build geometry inside of UDK and the teapot will be in the world with collision.
Picture
Teapot is now in UDK.
  You might be thinking that this script is good for importing simple objects but when used properly it can be used to import full levels. Below you can see an example of a map I made months ago. I tried to import it UDK before and getting the collision to work with a conventional MCDCX collision broke the level.

  The only way to import this level with the MCDCX collision would be to piece it out and import each piece with it's own collision. The faster way to do with would be to use this script.
Picture
A complex graybox.
  Using this script I was able to import this level with no trouble at all. My pipeline has been improved drastically with this script. I have only been using it for the past two weeks. I highly recommend using it.
Picture
In UDK with little to no trouble.
 To download this script go to http://commonbit.com/wiki/t3d_exporter_eng
Special thanks go to Daniel Hodvogner, the creator of this MaxScript.

- Danny Q
@Dannylv100
3 Comments

Tutorials and Temples

1/24/2012

0 Comments

 
  As a designer one challenge I face is figuring out how to teach the player how to play my game in the most unobtrusive way possible. I am talking about the tutorial level.

  One of the last games I bought was Gears of War 3. The instruction manual was about two pages long. When I  bought Gears of War 1 back in 2007 I read the instruction manual on my walk home. That manual had everything. It told me about the story of the game, the weapons, the enemies I would be facing, how to play, tips and it might of even had a section for notes. The manual for Gears 3 has controls for the game and... that is about it.

  Truth is, games no longer need instruction manuals. Not when the game can teach the player exactly how to play though the game itself.The first level in a game is usually the tutorial. When I first started working on my third person action game the first level I was working on was a tutorial level.

When I was attending Art Institute one of my professors saw me working on the first level of my game. He said that I should do something different, I should be innovative! Make the level begin with a shootout! Immediately the player is being shot at! Enemies are rushing the player! Make it really intense!

  That might sound like a great idea but in reality that is one of the worst scenarios imaginable. Think about it, if the first thing you did was get attacked by an enemy and you didn't know how to fight back wouldn't you get frustrated? I mean you don't even know how to play and everything in the game is attacking you. Even Call of Duty's first level doesn't start off like that. In both Modern Warfare 1 and 2 the player is eased into the game. In MW 1 the first thing they do is teach you how to aim and fire your weapon. You know why? So when you are in the middle of a shootout you know how to shoot back.   
  Pacing is important. Once the player knows how to play we can ramp up the difficulty. We need to make sure the player knows how to play the game before we send them in. One thing I always say is that a game is all about the "Players Experience". If the player gets frustrated with your game they have little reason to come back and play it. If the first experience a player has with your game/level is a quick confusing death they will find another game to play.

   One of the best examples of a tutorial level I can think of in recent times is the tutorial level in Red Dead Redemption. The part I am talking about is when you are on Bonnie's ranch. From that point on the player is introduced to just about every gameplay mechanic they will need. On the ranch the player is taught how to lock on, fire a weapon, change weapons, ride a horse etc. This is also interlaced with dialogue and cut scenes that inform the player on whats going on in the game and what the games story is. The first half hour of the game does this very well.

  Pacing is important. If you want to have a narrative you need to have those slow paced moments to tell the player about the story. How is the player supposed to care about their long lost brother when they have grenades being thrown at them and are on the verge of losing the level for the third time?
PictureAfter you get the boomerang the rest of the dungeon teaches you how to use it.
 Something that always stuck out to me in Legend of Zelda 64 was how the dungeons were set up. Every dungeon gave players an item that helped them in their journey. But how does the player learn to use this newly acquired item? Simple, the dungeon becomes a tutorial.

 Let me break it down. In Zelda 64 when you are in Lord Jabu Jabu's belly you get the boomerang. In this dungeon there are enemies that would normally hurt you if you used your sword on them but now with the boomerang you can defeat them and take no damage.


   This in turn trains the player for the boss battle. The dungeon introduces a new gameplay mechanic and then teaches the player how to use it. It prepares the player for the boss fight and once the player has defeated the boss they are effectively taught how to use the boomerang.
Picture
This dungeon spends the next 15-20 mins teaching the player how to use the spinner before the boss fight. Guess how you defeat the boss.
 Let me give you an example from the Freeze-E Frosty's tutorial level.
Picture
Freeze, freeze, jump, freeze and jump.
  The first thing the player does in Freeze-E Frosty's is learn to walk.  As soon as they enter the first hallway they find a wooden crate in their way. The player is then told that they need to "Freeze" it in order to get by. The player uses their "Freeze Gloves" by clicking on the left mouse. They break the first box with ease. They are then asked to freeze a second crate. The player now understand that wooden crates break when they are frozen.

 The next of the tutorial teaches the player how to jump. The player is told to jump on a moving platform. The platform takes the player up but not high enough for the player to get to this new area. The only way to get there is to jump a second time to reach the new area.

 Once the player reaches the new area (The area marked with the #3) they are once again their path is blocked by a metal crate being held by a claw. If the player freezes it the claw drops the crate. The crate however is made of steel and does not break apart like the wooden ones. This teaches the player the difference between the two. Once the path is clear the player can jump over the steel crate and move forward.

 The fourth area is a quick review. Once again the path is blocked. The player is given the option to either freeze what is in their way or simply jump over it. There is no wrong decision here. Nowhere in this tutorial can the player fail. There is no way for the player to be punished. A good tutorial will not punish the player in anyway.

  At the end of this short section the player effectively knows how to freeze and jump. Two skills they will need to complete the game.
   In short a good tutorial level should be unobtrusive and effective in teaching the player skills they will need to play the game as well as introduce the player to the main plot points and characters of the game. The days of instruction manuals are gone. It is up to us as the future game designers to find exciting new ways to make games even more enthralling.

-  Danny Q
@Dannylv100
​

0 Comments

Importing from 3ds Max to UDK

8/22/2011

5 Comments

 
 A friend recently asked me about importing assets into UDK. They were having a few problems. One problem was that the pivot was off once it was inside of UDK. The Second problem was that the size of there assets were off. Their assets were being imported way to small and they ended up looking like miniatures.

 So what I have done here is put together a simple little tutorial to help explain the process of bringing in assets from 3ds Max into UDK.
Picture
Feel free to copy this chart for your own use.
  Show the first thing to understand about UDK is that when making assets it is best to build them around the size of the standard UDK character. The standard height is 96 unreal units. That translates to about 6ft.

  If you are modeling assets inside of 3ds Max it is important to build to the correct scale. Many people new to UDK import assets that are too small or too big. It is important to know Unreal Units as a level designer too. When you are trying to build say a death match map you want to area to be big enough to allow players to run around and take cover but not so big that there are prolonged moments of not seeing another player. We will get more into that later.

 So lets say we want a small crate that is 2ft high. That would be 32 uu. Easy right? Well what if we want to make this crate 2.5ft? What we are going to do then is set the height of the box to 32 uu and add 8 units. 8 uu is equivalent to half a foot. So if we want to make the crate 3ft high we would need to add 16 units. So remember when you want to add a foot add 16 units. When you want to add half a foot add 8 units.

Picture
3ds Max tool bar -> Customize -> Units Setup
 Before you start modeling your assets in 3ds Max check the units setup. To check the units setup go to the top toolbar and click on "Customize". In the drop down menu scroll down until you find "Unit Setup". Once you click on it a pop up window will appear.
Picture
The default units in 3ds Max is set to generic units. If you are having trouble with the scale make sure to double check your unit setup.
 Once the pop up window is open you are going to see a couple of options. You are going to see Metric, US Standard, Custom and Generic Units. The one you want to have selected is "Generic Units".

 Generic Max units are equal to Unreal units. So if you were to model a simple box inside of 3ds Max that is as tall as the standard character you will have a good base to model from.

 I use generic units all the time for my modeling needs. I haven't run into a problem with them yet.

Picture
The width and the length of the standard UDK character is about 32 uu, which is 2 feet.
 The next thing we need to consider before we export our model out of 3ds Max is the pivot point. The pivot point in 3ds Max will reflect where it will appear inside of UDK. If you are getting a messed up pivot point inside of UDK there might be an easy explanation as to why.
Picture
 What you need to do is select your model with the "move tool" (the W key). In the bottom left you will find the X,Y and Z coordinates of the model. Notice how in the image above the X and Y Coordinates are just random numbers. If we were to import the model now the pivot point will be behind the model and not in its center.
Picture
  Centering the pivot and the model in 3ds Max is a very easy process. All you need to do is select the model you want to center and change the X,Y,Z coordinates to 0.

 Once the coordinates are set to 0 it is ready to be exported.
Picture
From right to left, 1 in object types, 2 in Output Options and 3 in Mesh Options.
 Once you are ready to export go to the 3ds Max logo in the top right of the screen. Select it. Scroll down to Export -> Export selected. Once that is clicked it will prompt you to save your model.

 Pick the location of where you want it saved and be sure to save it as an "ASE" file.
 
 Once that is done a pop up window with a bunch of options will come up. It looks complicated but it really isn't. All you need to do is go to "Object Types" and select the first check box which is Geometric.

  Where it says "Output Options" check the boxes for Mesh Definition and Materials.
And Finally where it says "Mesh Options" check all three of the boxes.

Once you got it all set up hit "Ok" and you're ready to import it into UDK.
Picture
 Once you got UDK open go to the bottom of the "Content Browser". There at the bottom you will find the import button. Click the import button and once it is clicked you will get a pop up window.
Picture
 The pop up window will ask you to name the grouping. Just type in "Mesh". You can also change the name here. I changed it from "Box1" to "Box_Asset". I left the package named "Untitled_1" because I am not going to save the package.
 
 Click "Ok" when you're done. You should get a little window telling you that the "Generated/Imported vertex count ratio is (180/80)".  You will get this error for a number of reasons.

The Reasons for this are:
- You have no UV map or you have more than 1.
- Your smoothing groups are splitting vertices
- You have an opening in the mesh
- There is no material for the mesh

 These errors are fine because this box is just a test. Just click "Ok" and your asset will be in the Content Browser. Drag your asset into the level. Make sure to save the asset first, otherwise if you jump into the level you won't be able to see it. Go into the content browser and right click on the asset or the package and click "Save". Now you are ready to hop into the level.
Picture
1st person view of the 6ft tall box.
 If we hop into the level we can now see our box. If we walk up to it we find it to be roughly the same height. As I mentioned before this asset will not have any collision so it is completely possible to walk through it.
Picture
The box is about the height and width of the UDK bot.
Picture
An off center pivot will give you all kinds of problems.
   Let's look at what happens if we imported the box into UDK incorrectly. If we select the box we find that the pivot is way out in front and to the left a bit. This is going to make placing your asset in the level a lot more complicated.

 Think of it this way, if you need to hand over this asset to the Level artist or world builder he/she is going to have a really hard time trying to place the assets when the pivot is completely off. Make sure to center every asset you export from 3ds Max. Even with simple block out meshes. Practice good exporting!
Picture
A perfectly placed pivot.
That is the end of the tutorial. I hope you found it useful. If you have any questions go ahead and ask. Feel free to copy and save my UDK conversion chart.

- Danny Q
@Dannylv100
​

5 Comments

How to make Checkpoints inside of UDK

5/27/2011

5 Comments

 
   Hey everyone! Today I am going to be demonstrating how to make checkpoints inside of UDK. Checkpoints are great for when you are making a single player game and you want the player to spawn nearby rather than at the start of the level.

   So I made a quick level inside of the Freeze-E Frosty's editor. Nothing fancy, it is just essentially a straight line where the player needs to get from point A to point B. The only thing is that along the path are three spike pits. If the player were to fall into anyone of them they will die and be sent back to the start.
Picture
Build your level inside of UDK to look just like this. Make sure you can easily jump over the spike pits with a single jump.
   So lets begin. What you are going to want to do in your level is set up a player start. To set up a player start click on your level selecting the ground and right click -> Add Actor -> Add Player Start. So now if we were to walk forward and fall into the spike pit we would die and respawn back at point A.

   To make a pit that will kill the player place the builder brush inside the pit and go to "Add Volume" button on the right side of the UDK screen. Select the "UTKillZVolume". (That volume stands for UT Kill Zone Volume.) Once you have it placed inside the pit go ahead and walk into it. The kill volume will kill you and once you respawn you will be back at the start. 
Picture
Make sure the first player start is enabled and is set to the Primary start.
   So lets set up our first checkpoint. Using the builder brush build a DynamicTriggerVolume. To create a DynamicTriggerVolume go to right side of the UDK screen and find the "Add Volume" button. Right click on it and at the top of the list select DynamicTriggerVolume. Inside of that DynamicTriggerVolume place another player start. This time go into its properties and uncheck "Enabled" and "Player Start". You should have a player start a pit with a kill volume inside of it and on the other side of the pit a DynamicTriggerVolume with a second player start inside of it.
Picture
Every player start that comes after the first player start should be disabled.
Picture
   The Next thing you are going to have to do is go into Kismet. To open up kismet find the green "K" next to the Generic Browser. Once Kismet is open go ahead and hold the "T" Key and click on the kismet work space. You should make a toggle kismet node appear. Do that again and make another one so you now have two. Link the output of the first toggle node to the "Turn Off" input of the second toggle node.

   Now go back to your level and select your DynamicTriggerVolume. Head back into kismet and right click in the kismet work space. Select New Event using "DynamicTriggerVolume 1" and once that node is made link it to the input of the first toggle node in the "on" input.
Picture
   Now go back into your level and select your first player start. Go into kismet and on the second toggle node right click on the "target" output and select "New object Var using player start 1". Select your second player start and do the same thing for your first toggle node.

   What we are telling kismet to do is to turn off the first player start when you touch the DynamicTriggerVolume. Once you make contact with the DynamicTriggerVolume it will then turn the second player start. Test it out. If you succeeded then whenever you fall in the pit you should respawn where you placed the second player start. Don't forget to build paths!
Picture
To add the box around the kismet nodes hold crtl and alt and drag select the nodes. Once you have all the nodes selected hit "C" and name the box.
   Now you might be thinking that we still have another pit in the level and you're right we need to make another checkpoint. So what we are going to do is make a second DynamicTriggerVolume and a third player start. Just duplicate the volume and player start by selecting them, holding alt and dragging them. Once they are in place do the same thing you did for the first checkpoint but make sure to change a few things in kisemt.
Picture
   Inside of kismet we now turn on the second and first player start once the player touches the second DynamicTriggerVolume. We also make the second DynamicTriggerVolume turn on the third player start. If this was done correctly you will respawn on the third player start once you reach the second trigger volume.
Picture
http://www.youtube.com/watch?v=1OePC9mvAvo
   So whenever you want there to be a checkpoint make another DynamicTriggerVolume and turn off the player starts that came before. I hope this tutorial helps.

- Danny Q
@Dannylv100
​

5 Comments

Let's Talk About Cover

5/14/2011

0 Comments

 
   When making a first person shooter or a third person shooter adding cover to the level is one of the most important things. When developing a level for a single player experience we need to give the player enough cover so they can advance throughout the map and complete their objective. The cover in the map will allow the player to take time to reload, heal and think out strategies. One of the most important things you need to realize about cover is that it should keep the action flowing.
Picture
The player is completely exposed while his enemy is safe and secure. Not a good balance of cover at all
 If we break down cover to its purist form it essentially is anything that the player can hide behind. So if we were to build a map inside of UDK (Unreal Developers Kit), and make a large cube in the center of the map we would of effectively made cover. If we were to spawn an Ai (Artificial Intelligence) bot to attack the player the player can circle strafe in either direction to avoid incoming fire while also being able to return fire.
Picture
The player can attack from either side.
So now that we established that a simple cube can be used as cover, but how can we make it more interesting? A simple way to do that is to break it apart. Cutting a diagonal path through it will give the player even more options.
Picture
The player now has even more ways to attack.
And if we continue to break the cube up even further we get something like this.
Picture
Now a simple cube has become a very interesting piece of cover.
 The game I am working on now is a  cover based third person shooter. There needs to be cover constantly available to the player. A general rule of thumb is that the player should be able to find cover within three seconds of leaving cover. No matter what kind of game you are making, first person shooter or third person the use of cover is very important.

- Danny Q
@Dannylv100
0 Comments

    Dannylv100

       I am an Indie Game and Level designer, Consultant and host of Divercast.

    Space Image
    Picture

    Picture
    Picture
    Picture
    Picture
    Picture
    Picture
    Picture
    Picture

    Picture


    Submit a Question
    Picture
    Picture
    Picture

    Picture
    Dannylv100 on Twitch

    How to support Dannylv100

    Popular Podcast Episodes:

    Episode 21
    Episode 24
    Episode 25

    DLC Episodes

    Ep1 - Misc Movie Talk
    ​Ep2 - Gears 4 Impression
    ​Ep3 - A-plaque-alypse​

    Popular Indie Arcade:

    Indivisible
    ​The Night That Speaks
    ​Greedy Guns
    ​

    Popular Posts:
    Frosty's - Now on Itch.io
    How to make checkpoints....
    The Wanderer: A New Infe...

    Monthly Blog Archive

    WWP Appearance
    E3 Survival Guide
    ​Gears 4 - COG Hammerburst ​
    Knights vs Ninjas (Part 1)
    Halo 5: Warzone Accessibility 
    Halo 5: REQ Card Redesign
    ​
    New The Last of Us Enemy
    GDC 2014 Video Roundup
    ​Mass Effect 3: Tracker Class
    Mass Effect 3: DLC classes 
    ​Frosty's: Lost Levels
    ​
    Frosty's: Soundtrack
    ​Importing to UDK from Max
    ​Basic Checkpoints (UDK)
    ​
    Physics vs Scripted Events
    Picture

    Categories

    All
    Blog Post
    E3
    FF Level Design
    Flash Game
    Forge
    Forge Creation
    Freeze E Frosty
    Game Design
    Game Design Doc
    Gears Of War
    Halo 5
    In Defense Of
    Indie Arcade
    Indie Dev
    Iphone
    Iphone Game
    Itch.io
    Level Design
    Level Design 101
    Lost Chapters
    Podcast
    Steam
    Support This Site
    Thoughts
    Tutorial
    Twitch
    Udk
    Unity
    Youtube


    Archives

    September 2018
    August 2018
    July 2018
    June 2018
    May 2018
    April 2018
    February 2018
    December 2017
    October 2017
    September 2017
    August 2017
    July 2017
    June 2017
    May 2017
    April 2017
    March 2017
    February 2017
    January 2017
    December 2016
    November 2016
    October 2016
    September 2016
    August 2016
    July 2016
    June 2016
    May 2016
    April 2016
    March 2016
    February 2016
    January 2016
    December 2015
    November 2015
    October 2015
    September 2015
    August 2015
    July 2015
    June 2015
    May 2015
    April 2015
    March 2015
    February 2015
    December 2014
    November 2014
    October 2014
    September 2014
    August 2014
    July 2014
    June 2014
    May 2014
    April 2014
    March 2014
    February 2014
    January 2014
    December 2013
    September 2013
    July 2013
    June 2013
    April 2013
    February 2013
    January 2013
    December 2012
    November 2012
    October 2012
    September 2012
    August 2012
    July 2012
    June 2012
    May 2012
    April 2012
    March 2012
    February 2012
    January 2012
    November 2011
    October 2011
    September 2011
    August 2011
    June 2011
    May 2011

    RSS Feed

Powered by Create your own unique website with customizable templates.