
A friend recently asked me about importing assets into UDK. They were having a few problems. One problem was that the pivot was off once it was inside of UDK. The Second problem was that the size of there assets were off. Their assets were being imported way to small and they ended up looking like miniatures.
So what I have done here is put together a simple little tutorial to help explain the process of bringing in assets from 3ds Max into UDK.
So what I have done here is put together a simple little tutorial to help explain the process of bringing in assets from 3ds Max into UDK.

Feel free to copy this chart for your own use.
Show the first thing to understand about UDK is that when making assets it is best to build them around the size of the standard UDK character. The standard height is 96 unreal units. That translates to about 6ft.
If you are modeling assets inside of 3ds Max it is important to build to the correct scale. Many people new to UDK import assets that are too small or too big. It is important to know Unreal Units as a level designer too. When you are trying to build say a death match map you want to area to be big enough to allow players to run around and take cover but not so big that there are prolonged moments of not seeing another player. We will get more into that later.
So lets say we want a small crate that is 2ft high. That would be 32 uu. Easy right? Well what if we want to make this crate 2.5ft? What we are going to do then is set the height of the box to 32 uu and add 8 units. 8 uu is equivalent to half a foot. So if we want to make the crate 3ft high we would need to add 16 units. So remember when you want to add a foot add 16 units. When you want to add half a foot add 8 units.

3ds Max tool bar -> Customize -> Units Setup
Before you start modeling your assets in 3ds Max check the units setup. To check the units setup go to the top toolbar and click on "Customize". In the drop down menu scroll down until you find "Unit Setup". Once you click on it a pop up window will appear.
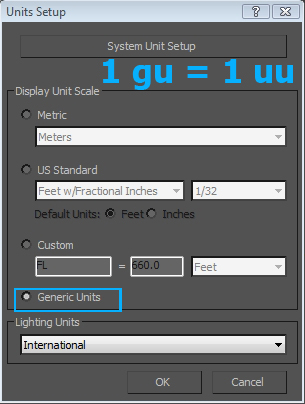
The default units in 3ds Max is set to generic units. If you are having trouble with the scale make sure to double check your unit setup.
Once the pop up window is open you are going to see a couple of options. You are going to see Metric, US Standard, Custom and Generic Units. The one you want to have selected is "Generic Units".
Generic Max units are equal to Unreal units. So if you were to model a simple box inside of 3ds Max that is as tall as the standard character you will have a good base to model from.
I use generic units all the time for my modeling needs. I haven't run into a problem with them yet.
Generic Max units are equal to Unreal units. So if you were to model a simple box inside of 3ds Max that is as tall as the standard character you will have a good base to model from.
I use generic units all the time for my modeling needs. I haven't run into a problem with them yet.
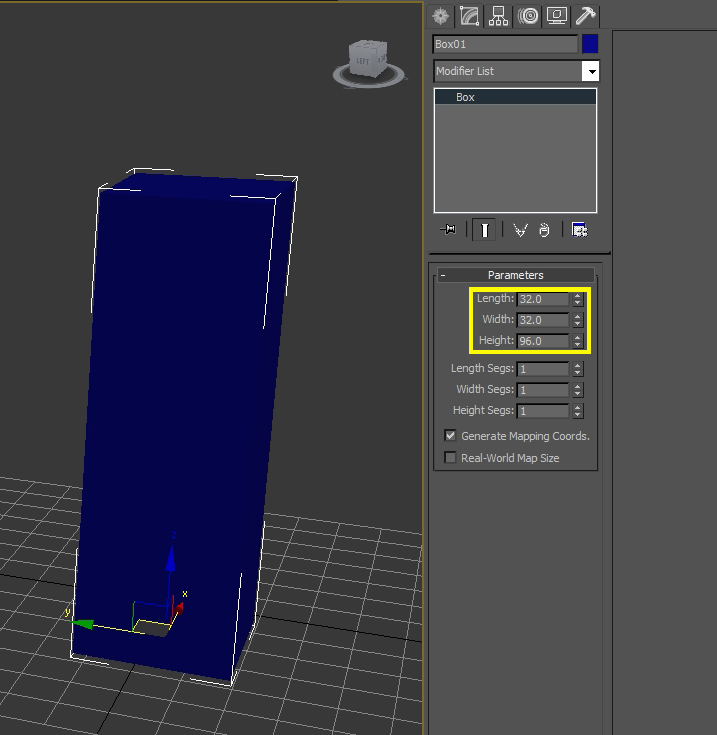
The width and the length of the standard UDK character is about 32 uu, which is 2 feet.
The next thing we need to consider before we export our model out of 3ds Max is the pivot point. The pivot point in 3ds Max will reflect where it will appear inside of UDK. If you are getting a messed up pivot point inside of UDK there might be an easy explanation as to why.

What you need to do is select your model with the "move tool" (the W key). In the bottom left you will find the X,Y and Z coordinates of the model. Notice how in the image above the X and Y Coordinates are just random numbers. If we were to import the model now the pivot point will be behind the model and not in its center.
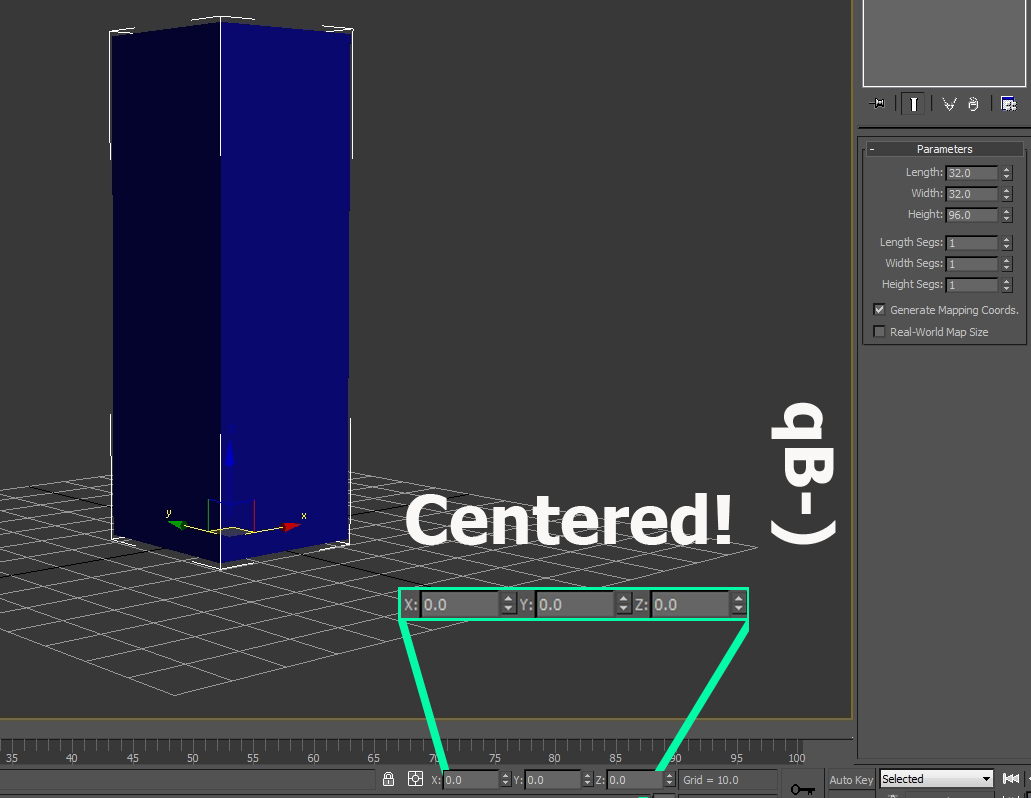
Centering the pivot and the model in 3ds Max is a very easy process. All you need to do is select the model you want to center and change the X,Y,Z coordinates to 0.
Once the coordinates are set to 0 it is ready to be exported.
Once the coordinates are set to 0 it is ready to be exported.
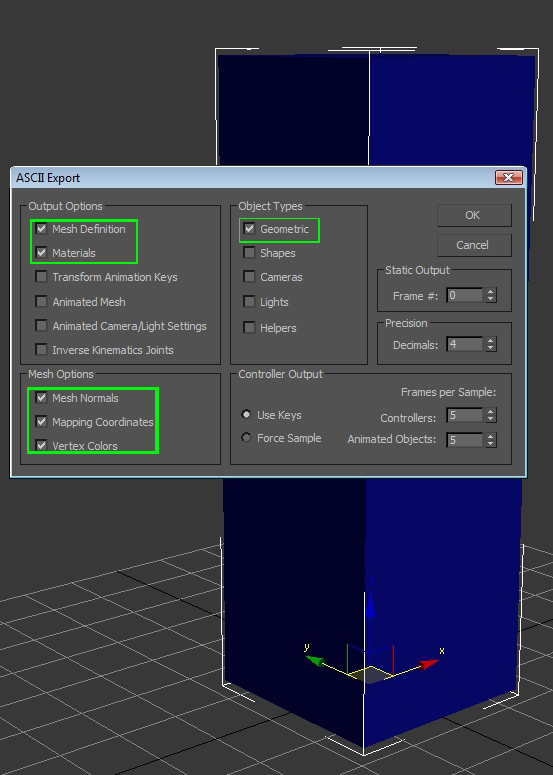
From right to left, 1 in object types, 2 in Output Options and 3 in Mesh Options.
Once you are ready to export go to the 3ds Max logo in the top right of the screen. Select it. Scroll down to Export -> Export selected. Once that is clicked it will prompt you to save your model.
Pick the location of where you want it saved and be sure to save it as an "ASE" file.
Once that is done a pop up window with a bunch of options will come up. It looks complicated but it really isn't. All you need to do is go to "Object Types" and select the first check box which is Geometric.
Where it says "Output Options" check the boxes for Mesh Definition and Materials.
And Finally where it says "Mesh Options" check all three of the boxes.
Once you got it all set up hit "Ok" and you're ready to import it into UDK.
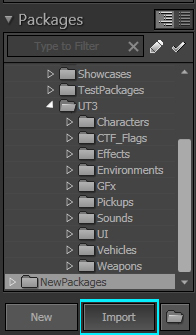
Once you got UDK open go to the bottom of the "Content Browser". There at the bottom you will find the import button. Click the import button and once it is clicked you will get a pop up window.
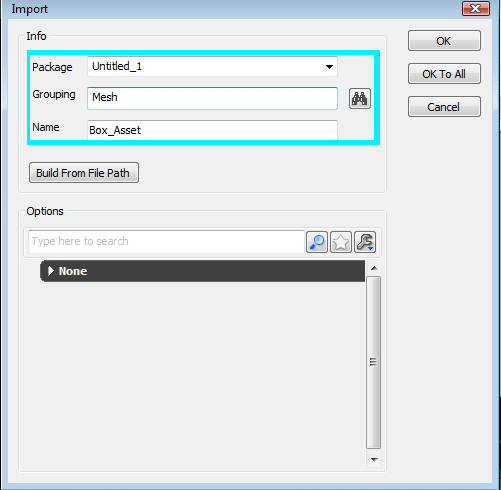
The pop up window will ask you to name the grouping. Just type in "Mesh". You can also change the name here. I changed it from "Box1" to "Box_Asset". I left the package named "Untitled_1" because I am not going to save the package.
Click "Ok" when you're done. You should get a little window telling you that the "Generated/Imported vertex count ratio is (180/80)". You will get this error for a number of reasons.
The Reasons for this are:
- You have no UV map or you have more than 1.
- Your smoothing groups are splitting vertices
- You have an opening in the mesh
- There is no material for the mesh
These errors are fine because this box is just a test. Just click "Ok" and your asset will be in the Content Browser. Drag your asset into the level. Make sure to save the asset first, otherwise if you jump into the level you won't be able to see it. Go into the content browser and right click on the asset or the package and click "Save". Now you are ready to hop into the level.
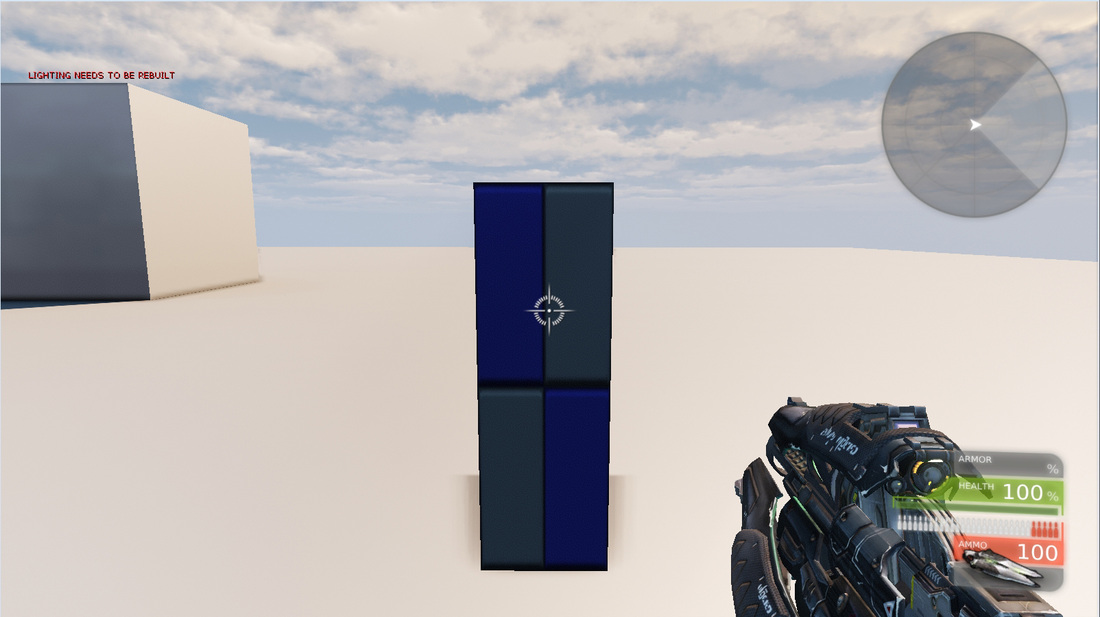
1st person view of the 6ft tall box.
If we hop into the level we can now see our box. If we walk up to it we find it to be roughly the same height. As I mentioned before this asset will not have any collision so it is completely possible to walk through it.
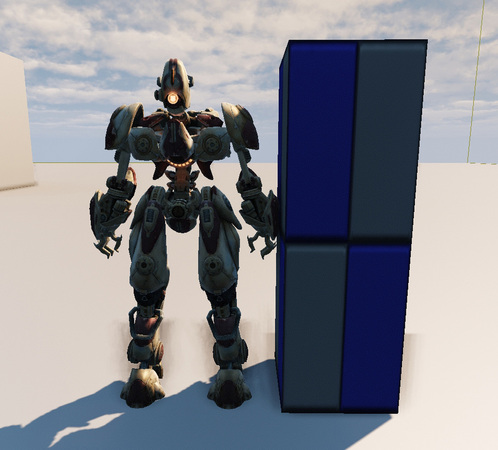
The box is about the height and width of the UDK bot.
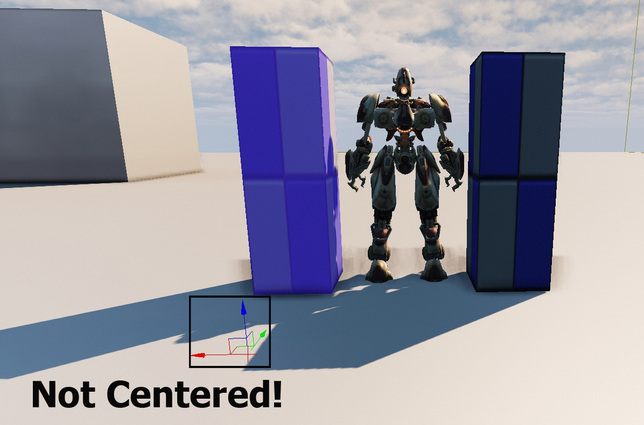
An off center pivot will give you all kinds of problems.
Let's look at what happens if we imported the box into UDK incorrectly. If we select the box we find that the pivot is way out in front and to the left a bit. This is going to make placing your asset in the level a lot more complicated.
Think of it this way, if you need to hand over this asset to the Level artist or world builder he/she is going to have a really hard time trying to place the assets when the pivot is completely off. Make sure to center every asset you export from 3ds Max. Even with simple block out meshes. Practice good exporting!
Think of it this way, if you need to hand over this asset to the Level artist or world builder he/she is going to have a really hard time trying to place the assets when the pivot is completely off. Make sure to center every asset you export from 3ds Max. Even with simple block out meshes. Practice good exporting!
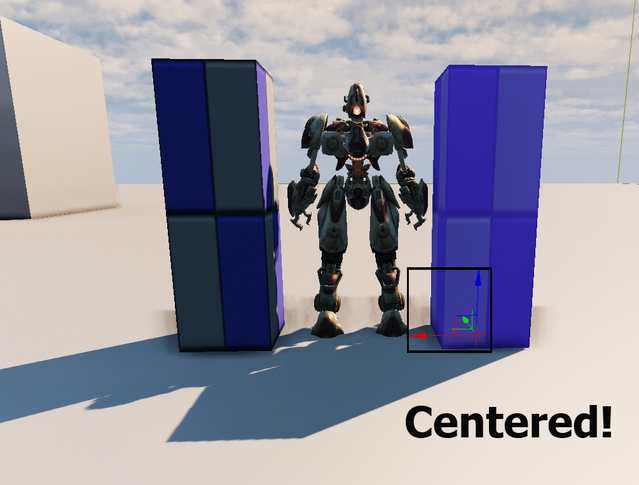
A perfectly placed pivot.
That is the end of the tutorial. I hope you found it useful. If you have any questions go ahead and ask. Feel free to copy and save my UDK conversion chart.
- Danny Q
@Dannylv100
- Danny Q
@Dannylv100


 RSS Feed
